

The following blog is an outline of how to configure and use Business Central’s Subscription & Recurring Billing module to manage and bill customers for a recurring billing scenario. This scenario is for billing a customer for Business Central Essential licenses monthly. However, the idea and configurations here will translate to other recurring billing scenarios as well, like service contracts, recurring rentals, and any other scenario needing a regular recurring invoice.
Fair warning…
- The new Subscription and Recurring Billing module has many new concepts and will take a good amount of testing to understand.
- This blog is intended for those who are well versed on using Business Central.
- The screenshots run through prerequisite configurations and one specific recurring billing scenario.
- It is not my intention to explain lots of concepts here. Rather, I want to show you this scenario working.
- If you’re looking for additional information, you can check out Microsoft’s documentation as noted below:
- My hope is that seasoned Business Central users can fill in the gaps and configure/get a similar scenario working in much less time than it took me to figure out.
- I’ve put these notes together for my own purposes but want to make them available to others to add to the Business Central body of knowledge available on the internet.
Prerequisite Configurations
- I’m using a Cronus demo company and the following configurations to showcase this recurring billing scenario.
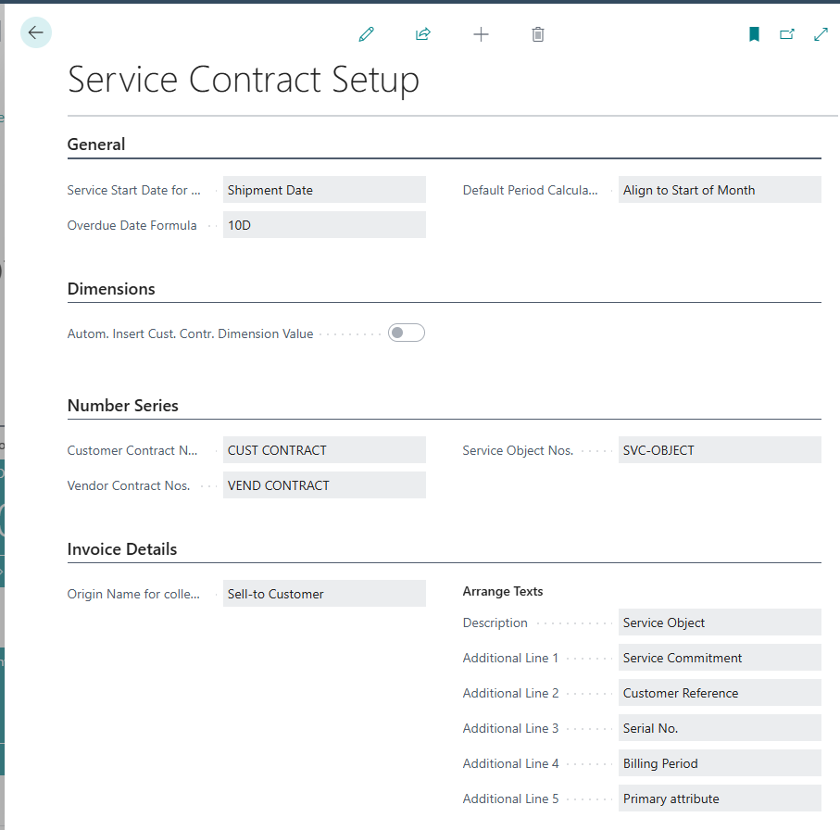
- Configure the Service Contract Setup page. Most all of the following are required configurations for our scenario.
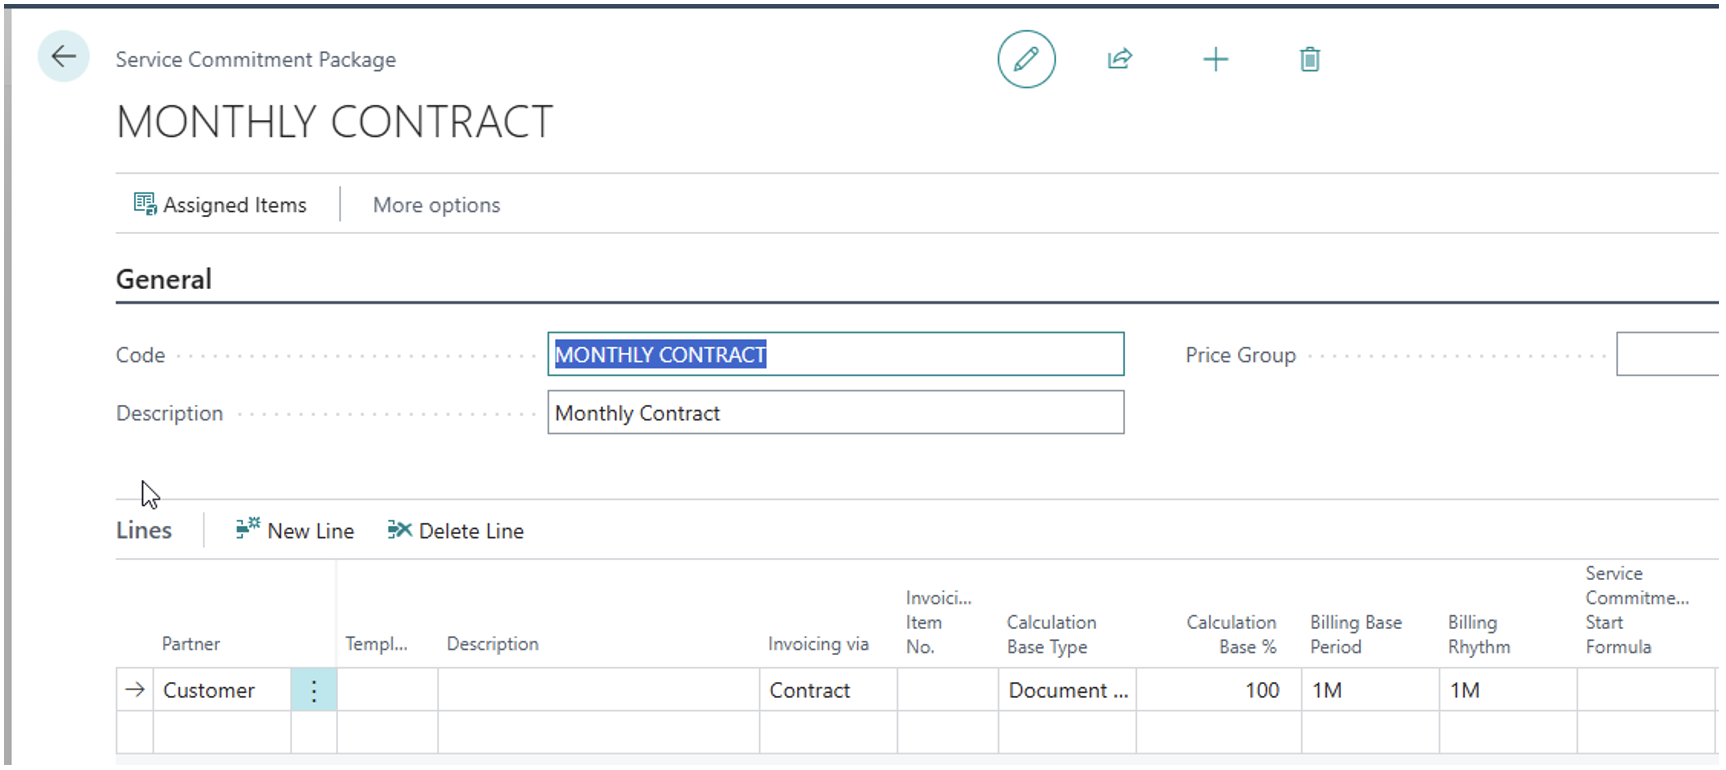
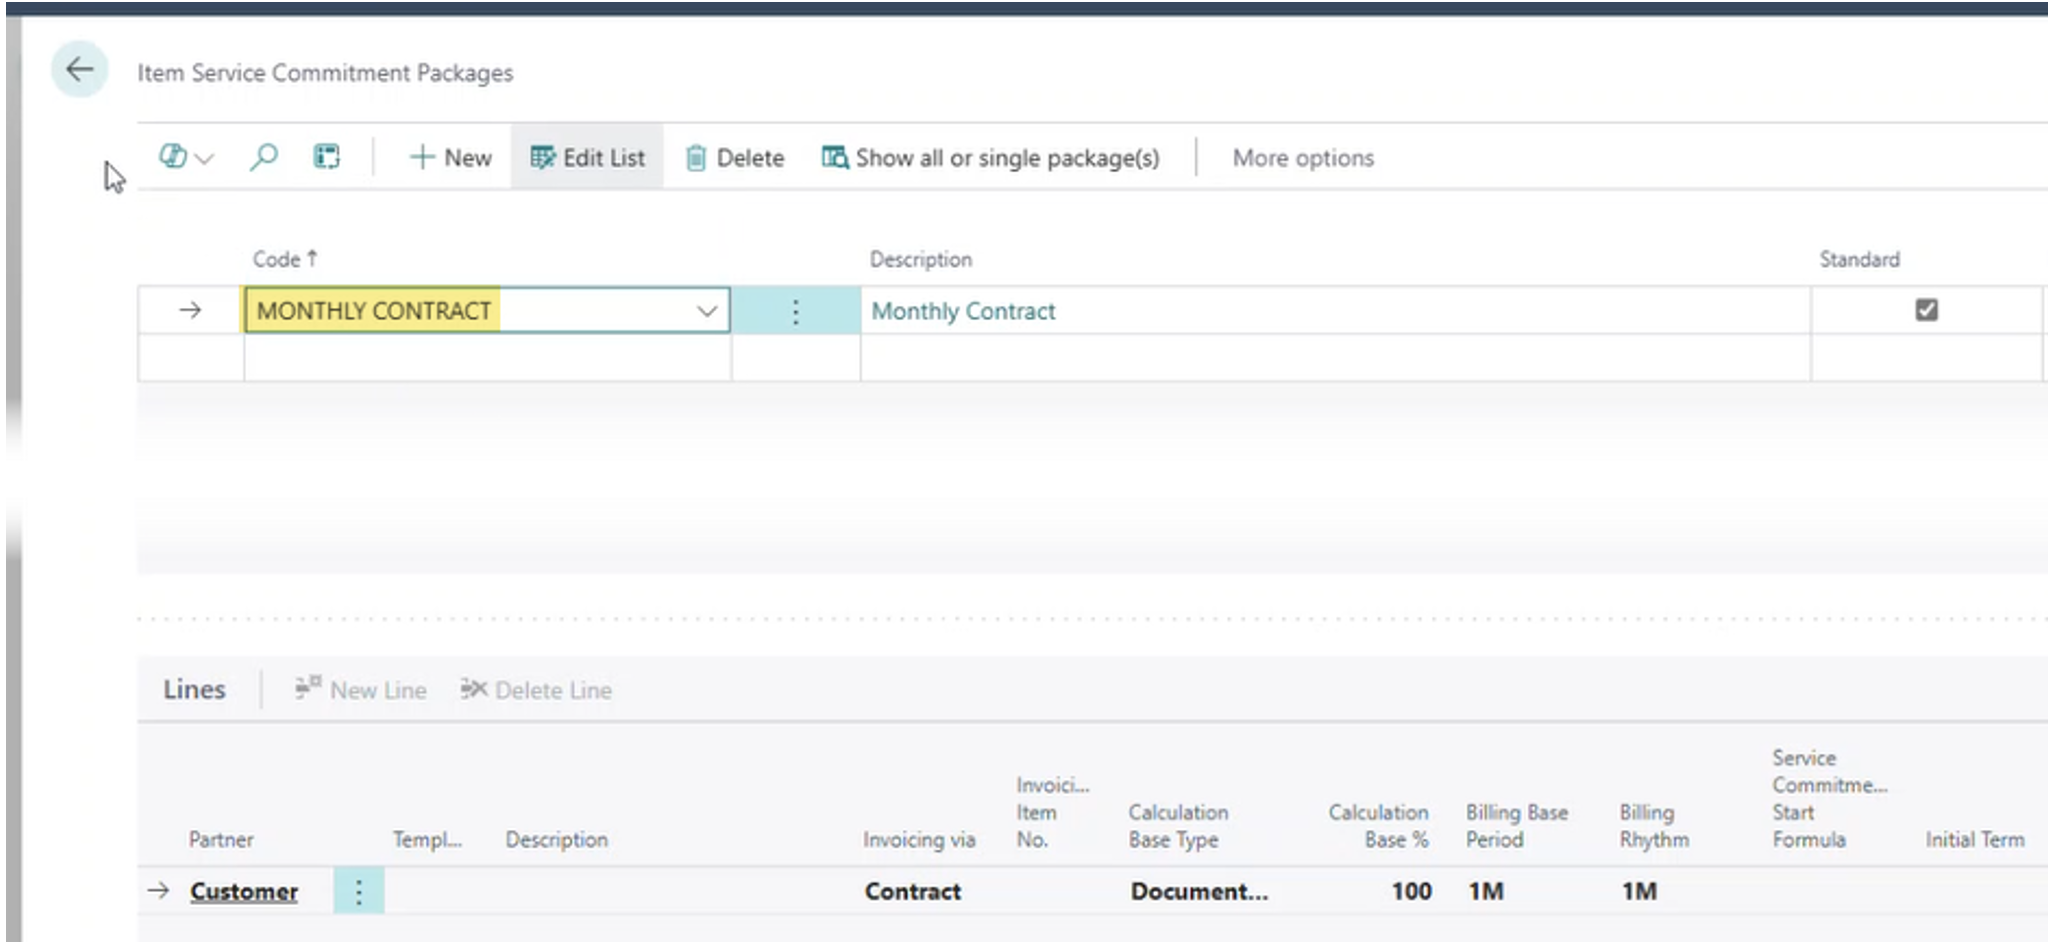
- Create a Service Commitment Package, using the following configurations. These configurations primarily specify that billing will happen monthly.
- Set up a Billing Template. Billing Templates can be accessed via the Recurring Billing page.

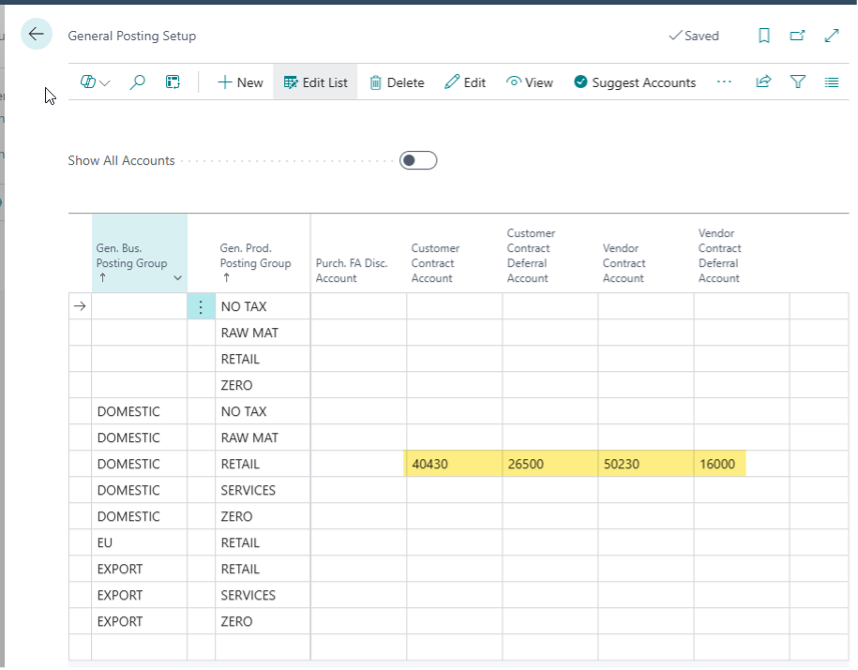
- Configure the General Posting Setup page by assigning account values to the four new subscription billing columns.
Create the New Item
- Be aware of the following:
- This item will be used on Sales Invoices for the recurring billing processes.
- I’ve moved all the item record’s critical values to the Item FastTab (and hidden other values) to make screenshots smaller.
- These configurations work within a Cronus company. You’ll need to configure the item to fit the requirements of whatever environment you’re working in. These should be a good starting point, but your environment may necessitate additional item configurations.
- Create the new item using the following configurations:
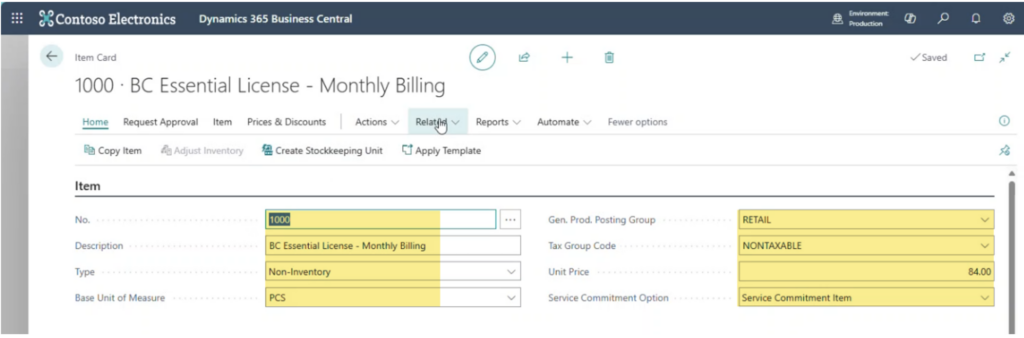
- Add the Service Commitment to the item.
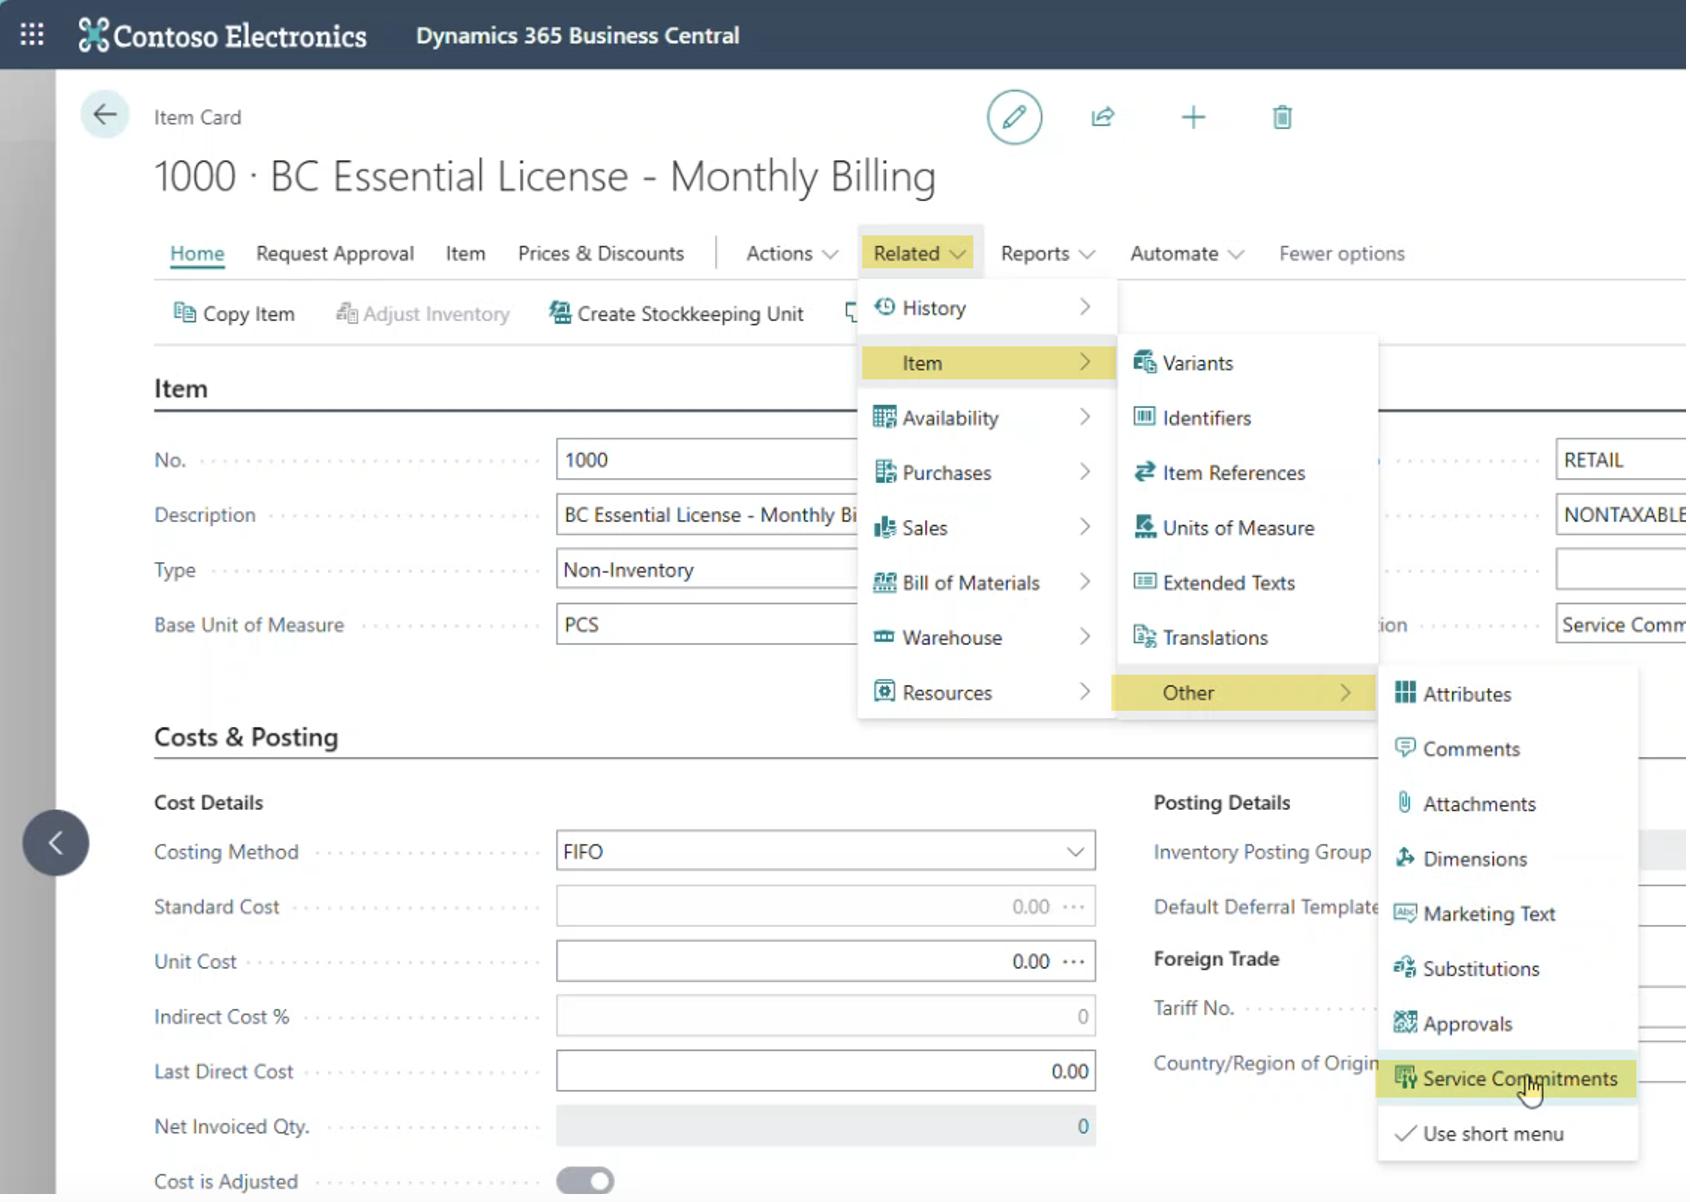
- Assign the MONTHLY CONTRACT Service Commitment Package configured earlier.
- That rounds out the preliminary configurations. With these configurations in place, you should be ready to setup the recurring billing scenario.
Recurring Billing Use Case Scenario
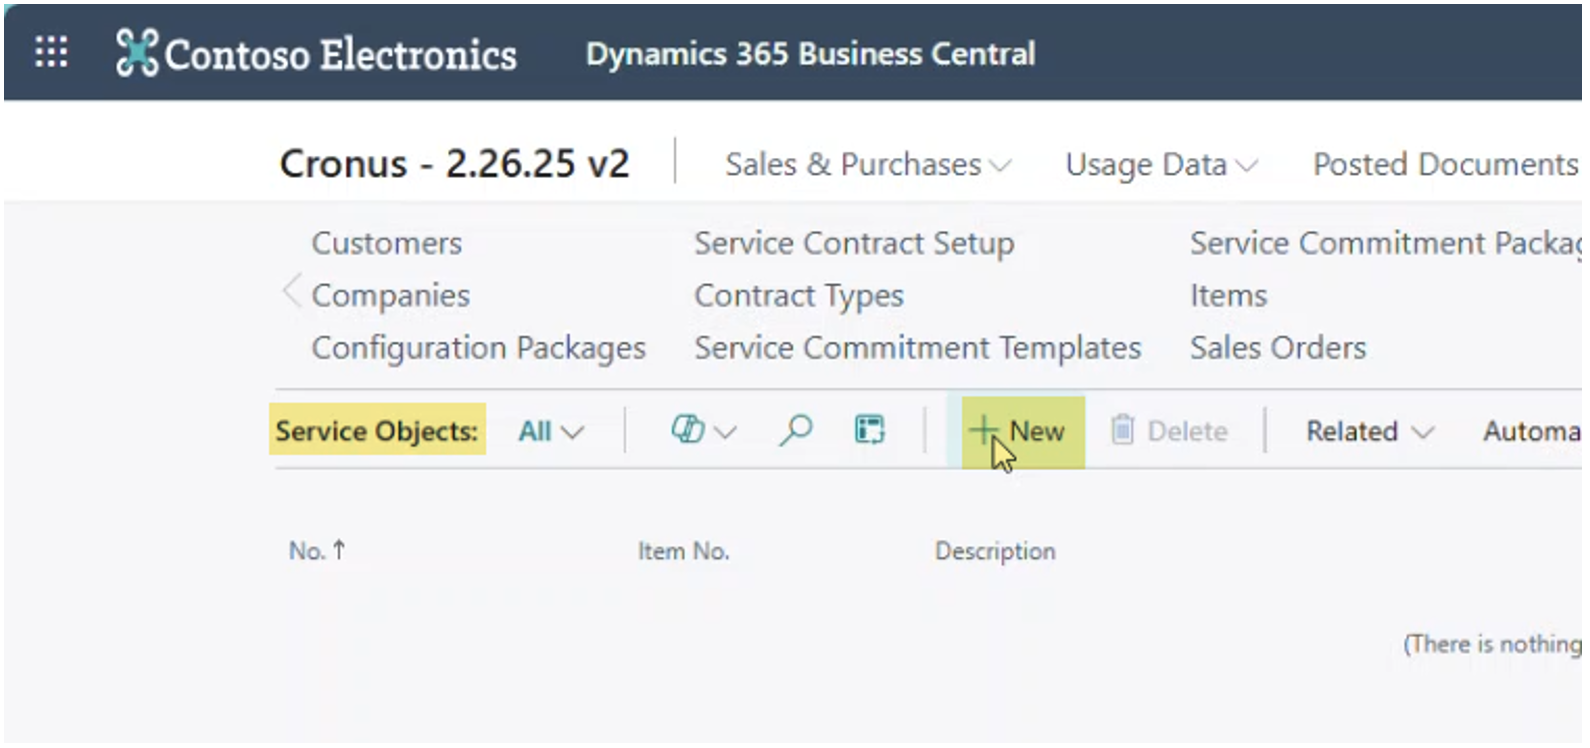
Create a Service Object
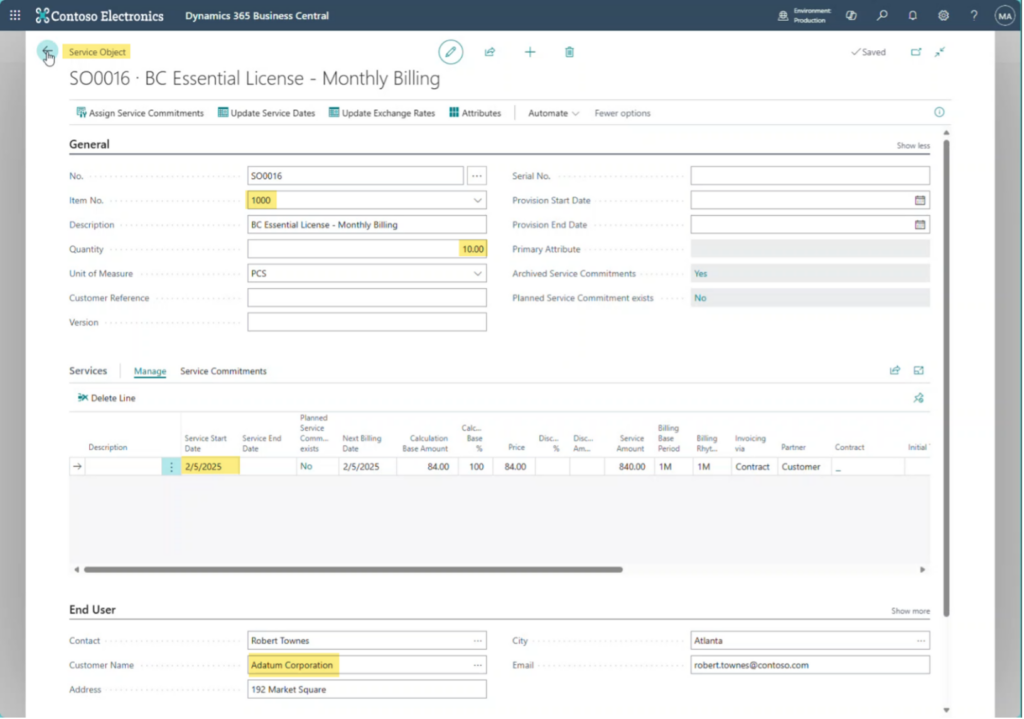
- Create a Service Object.
- In this case, the Service Object identifies which inventory item is going to be presented on the Sales Invoice, the quantity to be invoiced, which customer will be invoiced, the service start date, etc.
- Creating this Service Object will create a corresponding Service Commitment.
- Multiple Service Commitments can be associated with a single Service Object, as indicated by the header and line structure of the Service Object page, but only one is needed for our scenario.
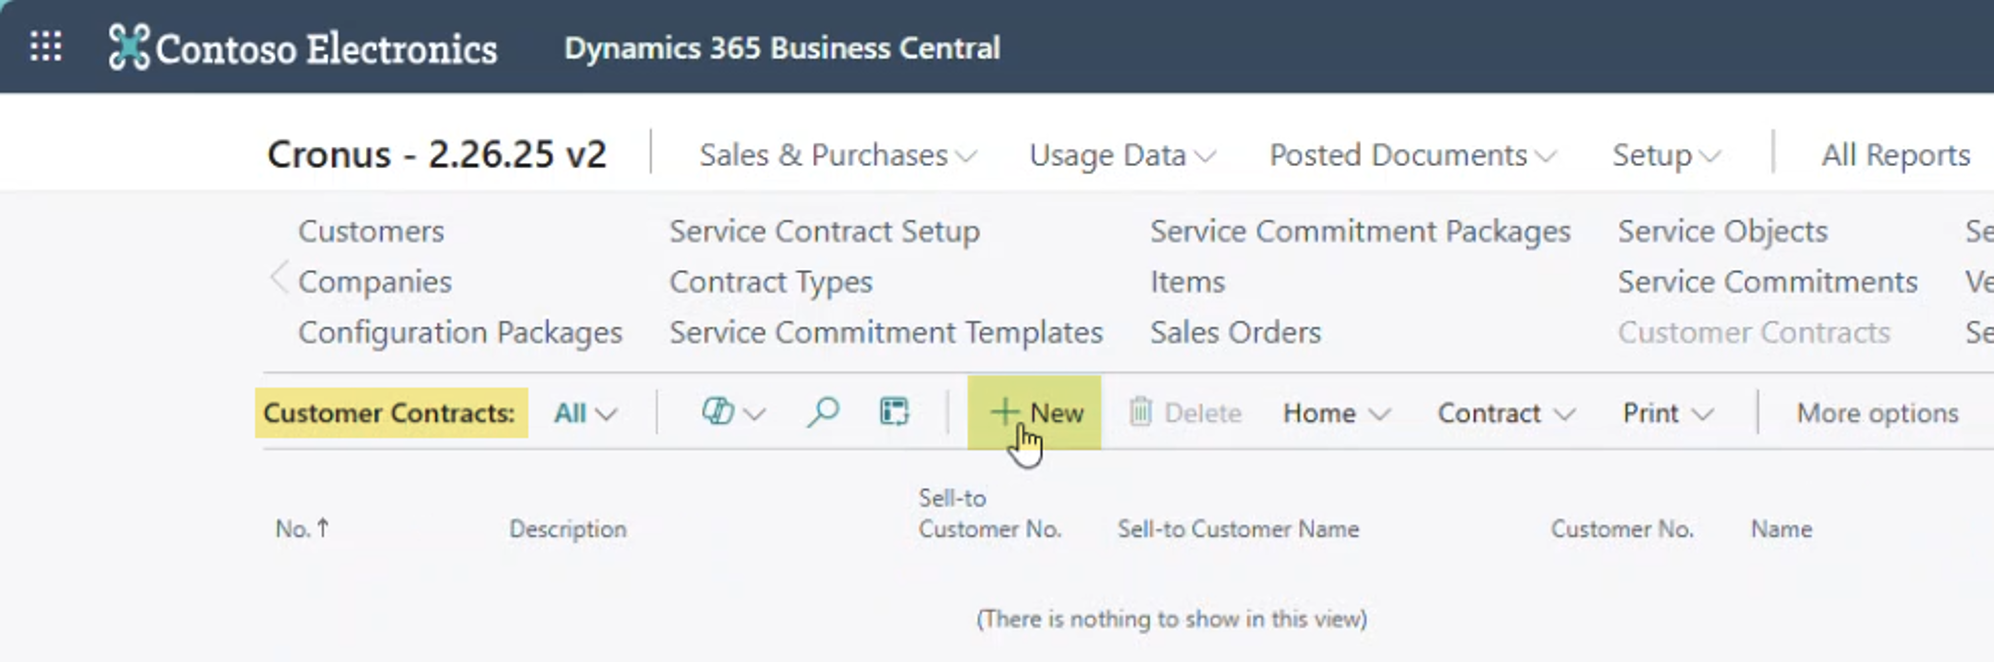
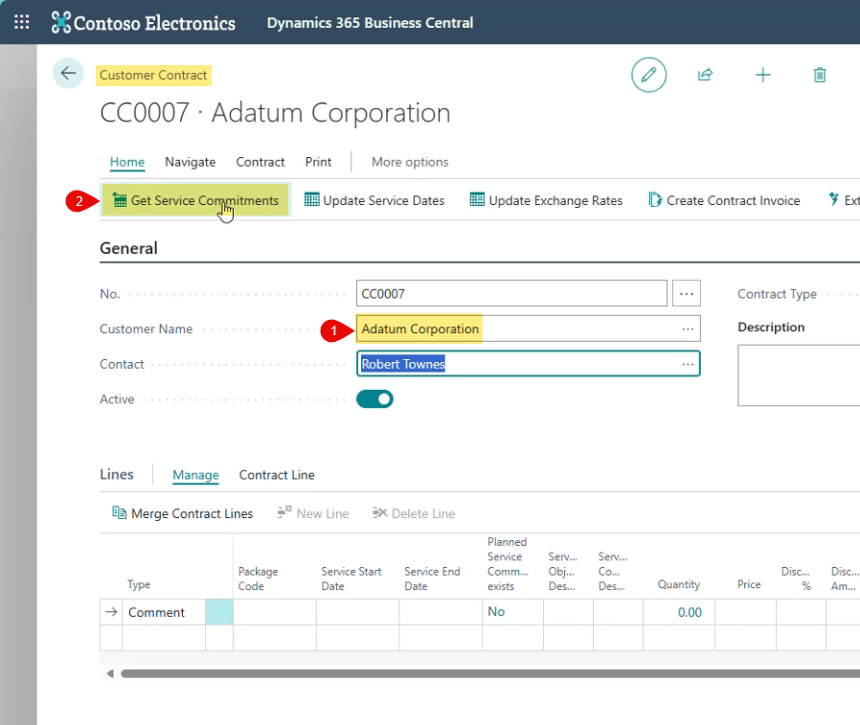
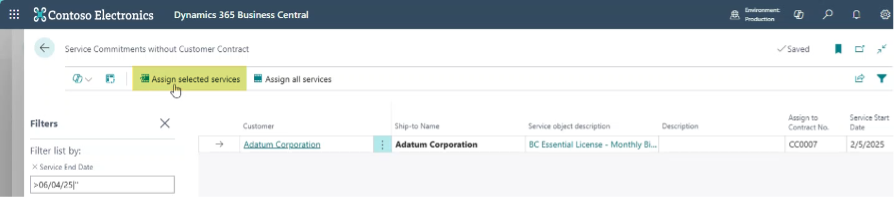
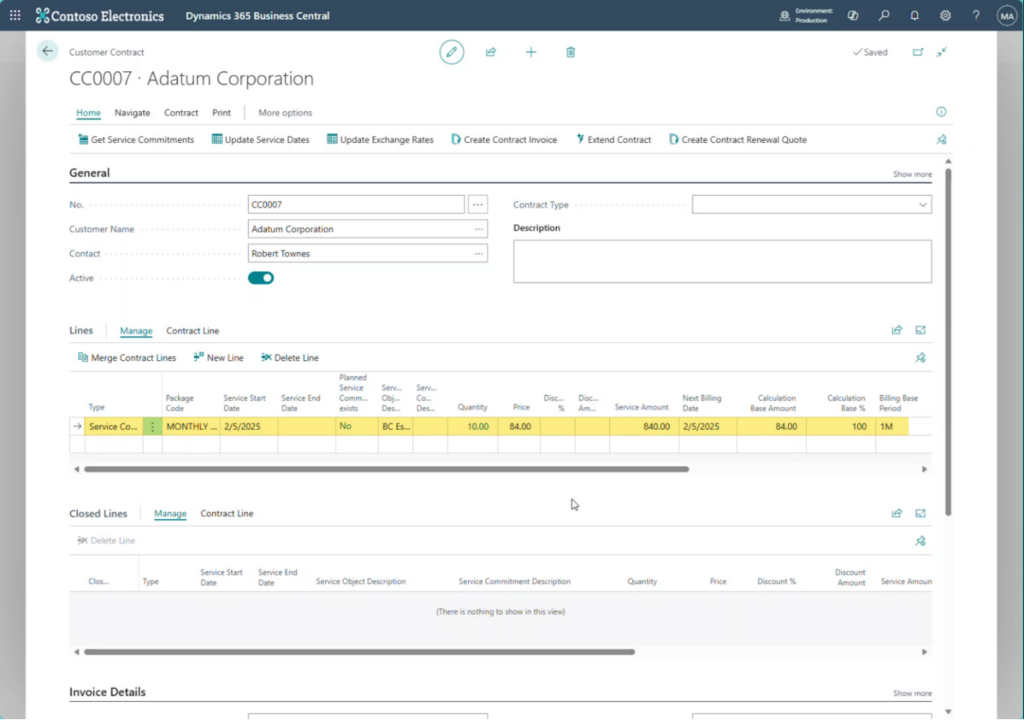
Create a Customer Contract
- Create a Customer Contract. Customer Contracts are used by the Recurring Billing tool to generate customer invoices.
- All invoices that are auto generated via the Recurring Billing tool must be associated with a Customer Contract.
- Multiple Service Objects can be associated with a single Customer Contract, as indicated by the header and line structure of the Customer Contract page, but only one is needed for our scenario.
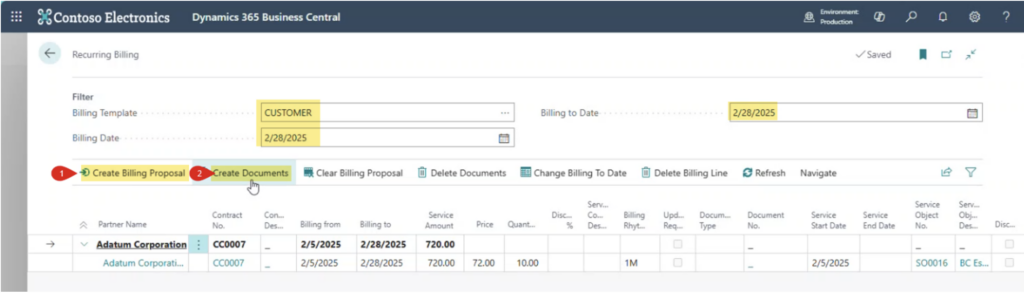
Use the Recurring Billing tool to generate the first month’s invoice
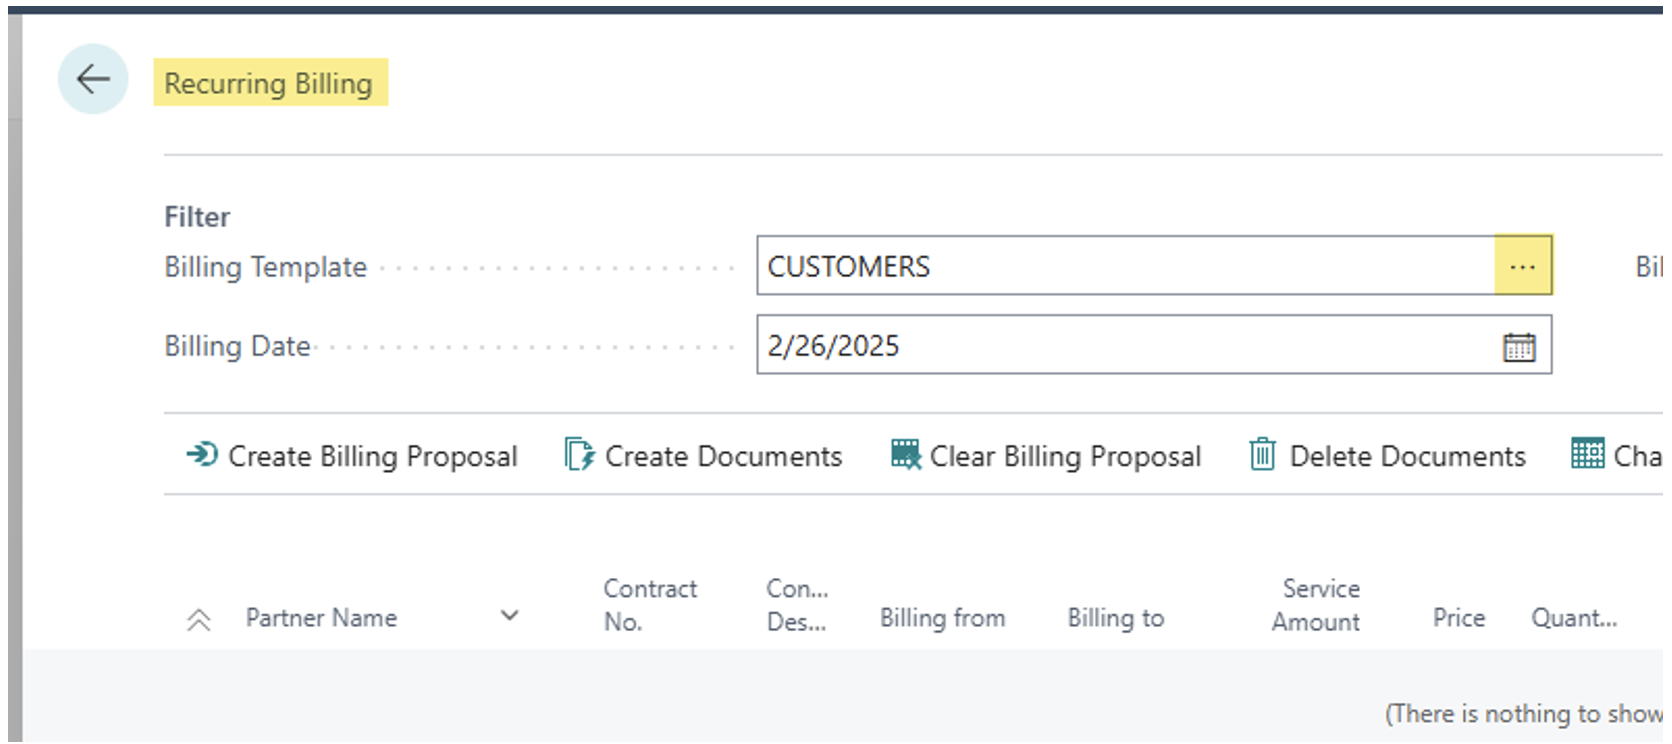
- Set the filters at the header level of the Recurring Billing page.
- Run the Create Billing Proposal function and the Recurring Billing page shows two lines:
- The Customer Contract – the bold first line
- The Service Object/Service Commitment – the second line
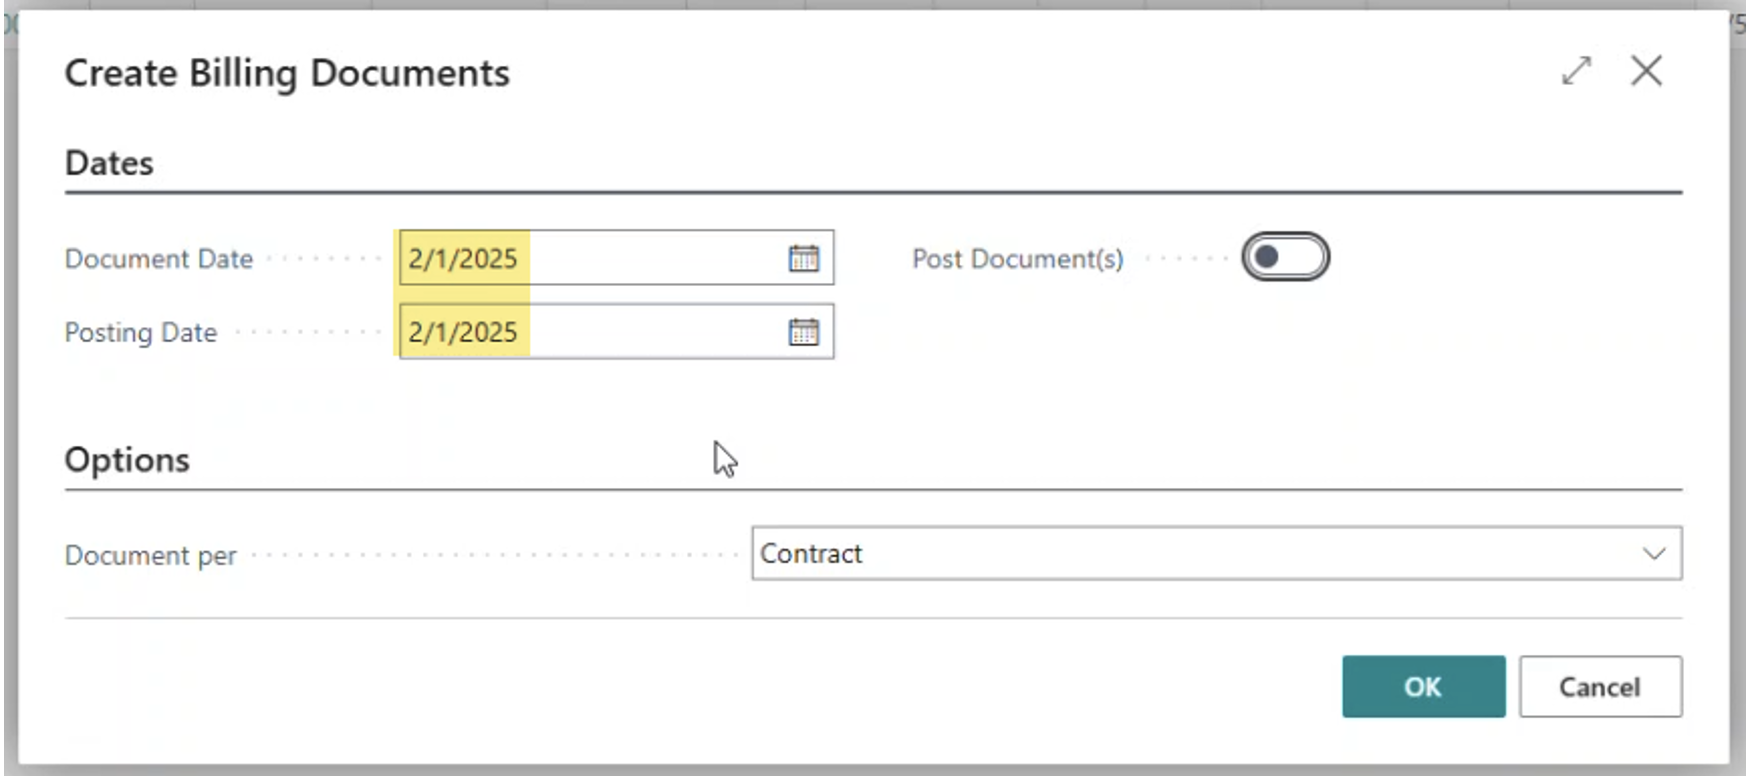
- Run the Create Documents function to have Business Central create the sales invoice.
- Note that the below features are date sensitive:
- The Service Object and Service Commitment above was set up with a Service Start Date of 2/5/25.
- In the Recurring Billing scenario showcased below, you can see that the billing is being done through 2/28/25.
- Accordingly, the invoice that will be created will be prorated to account for the partial month’s billing (2/5 – 2/28).
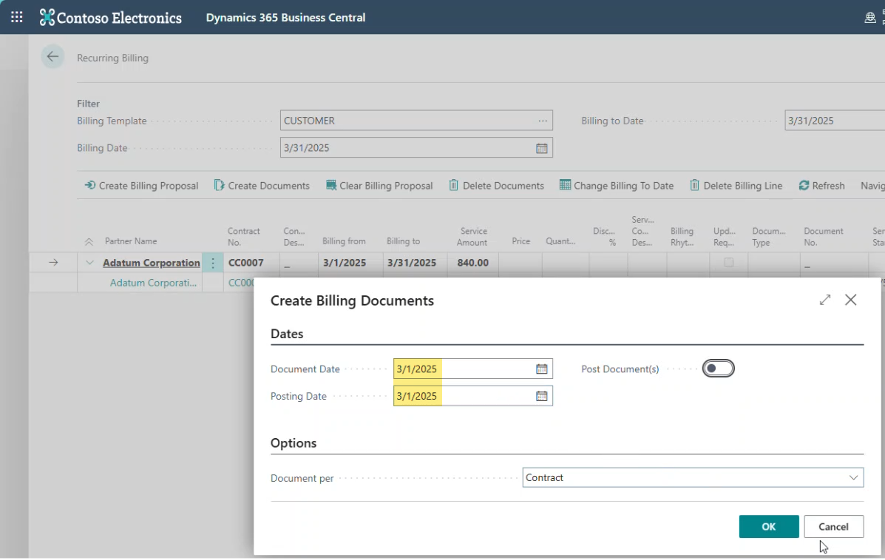
- In my scenario, I’m creating the Sales Invoice with a 2/1/25 Document Date and Posting Date, but this could also be set to other dates. Configure this page as desired and click on OK.

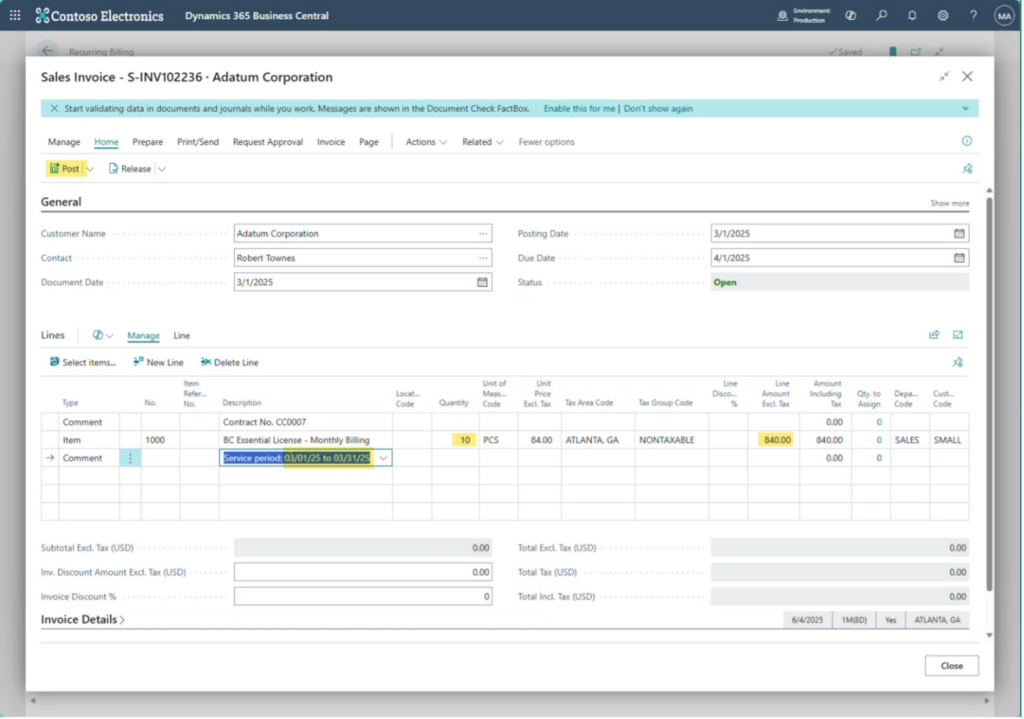
- You can quickly open Sales Invoice via the Document No. field on the Recurring Billing line.
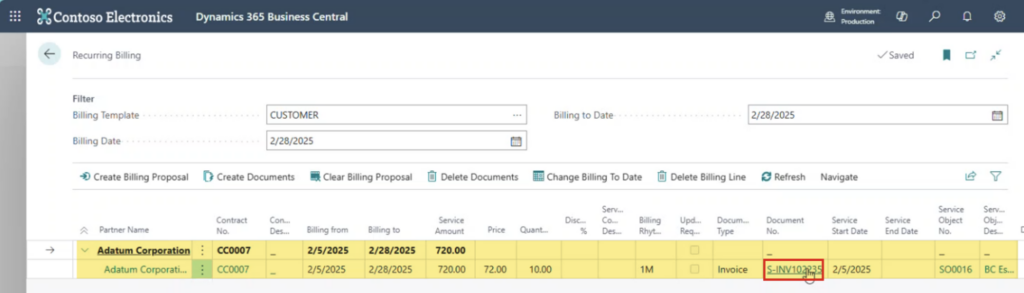
- If the invoice looks good, Post it.

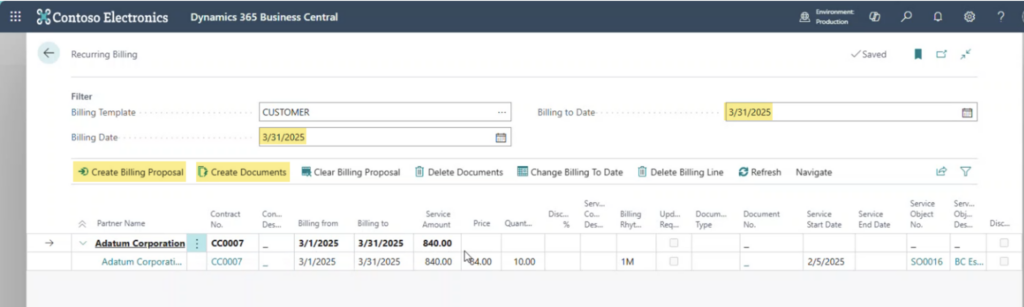
Use the Recurring Billing tool to generate the second month’s invoice
- On the Recurring Billing page, update the header values to bill through the next month and run the Create Billing Proposal function.
- Run the Create Document function.
- Fill out the Create Billing Documents form as appropriate and hit OK.
- Open the Sales Invoice and, if it looks good, Post it.
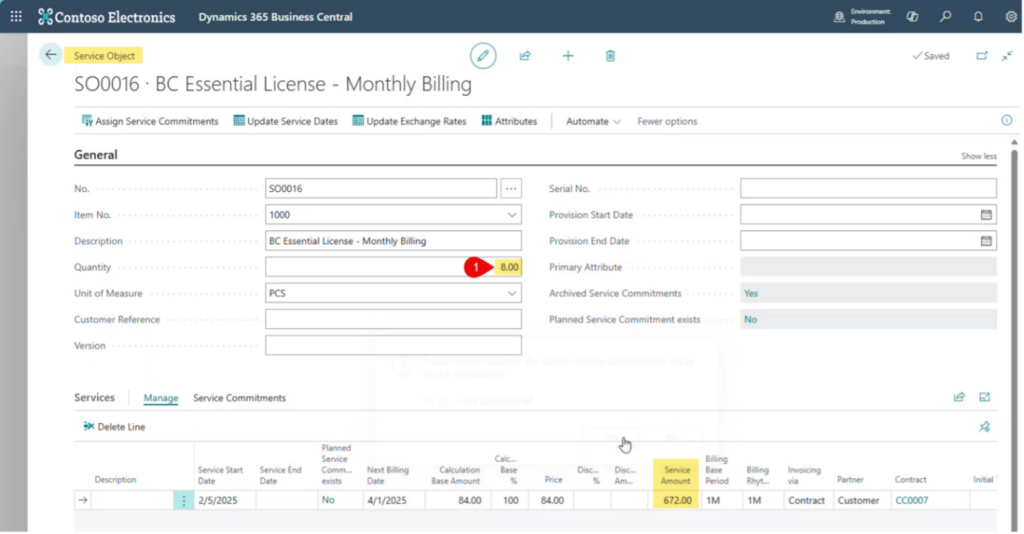
Adjust the number of licenses and use the Recurring Billing page to create the next month’s invoice.
- The following is how you’d handle the customer changing the number of Business Central licenses they use (or units of whatever you are invoicing).
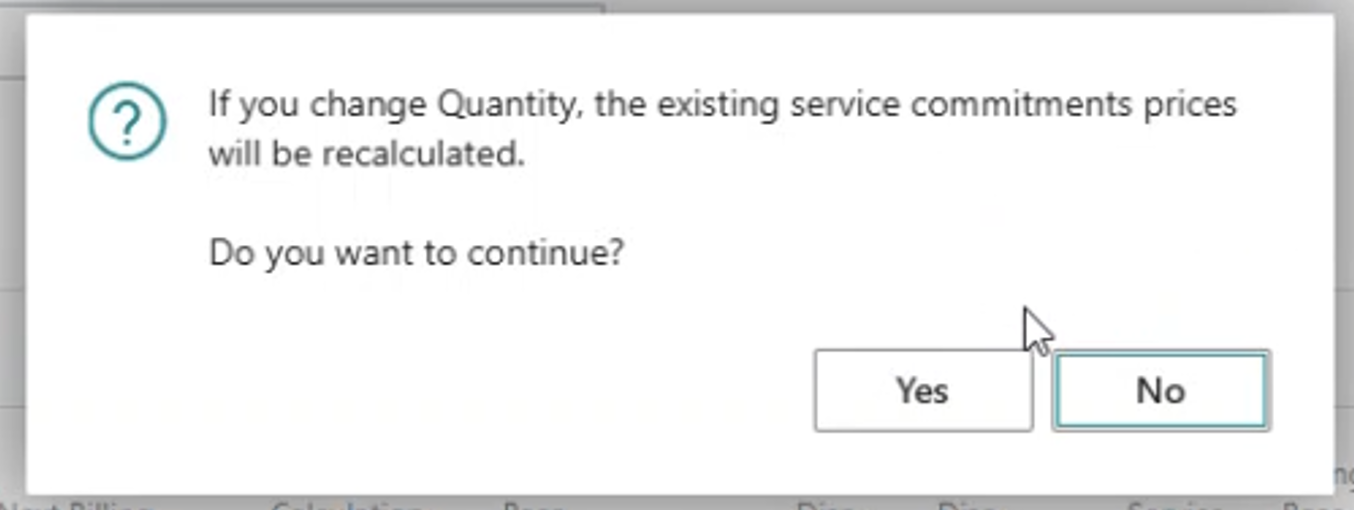
- Open the Service Object and update the Quantity field value and click Yes on the confirmation message.
- Now use the Recurring Billing page to generate the next month’s invoice.
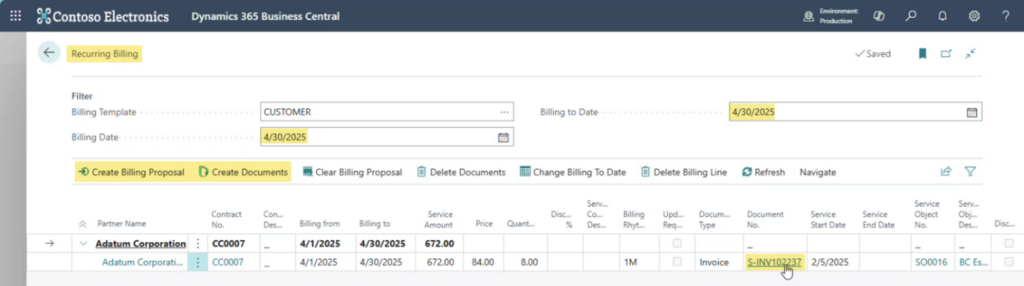
- Notice that the quantity on the invoice has been updated according to the change made to the Service Object.

- And that’s it! That’s how to use the new Subscription and Recurring Billing module to handle a monthly recurring billing scenario.
Follow our blog for more useful guides on how to use Microsoft Dynamics 365 Business Central.