In a previous blog post, A Few of Our Favorite Features in Dynamics SL 2011 – Part 1, we discussed a few really cool features like Menu Searching, Navigation History, Grid to Excel, and the new Attachment feature in Dynamics SL 2011. In this post, we’d like to highlight another great and usable feature called Quick Query that is available in Dynamics SL 2011 or Dynamics SL 2011 Feature Pack 1, which became available in the summer of 2013.
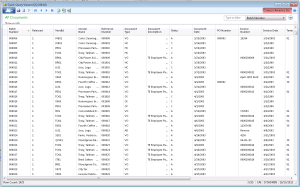
Quick Query is a tool that allows a user to query the database for data that the user needs to see. Prior to version 2011, there really was only one way to retrieve data from the Dynamics database which was to run a report. Those reports were written in Crystal. Crystal has a lot of functionality, and is pretty good at retrieving data. However, it is sometimes a bit cumbersome to run a report when you just want to see a subset or just one data element. Crystal also doesn’t always export to Excel very easily. Quick Query is now going to be your new best friend when it comes to looking up data. Below is a picture of a sample Quick Query.
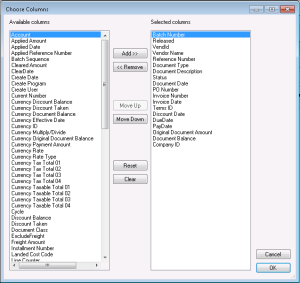
This is a view of all AP documents. There are about 150 other prewritten views to get you started with Quick Query. However, it is important to know that you, as a user have the ability to modify these queries very easily. You can add or remove columns. You can move columns to the right or to the left by dragging the column header one way or the other. If you right click on any of the column headers, you will see an option to “Choose Columns”, “Rename Column”, or “Remove Column”. If you choose to “Choose Columns”, you will get a list of possible columns to add to the query. The AP Documents query above gives you approximately 100 additional fields that you can add to this query. See below:
You can choose any of the above fields in the left column by highlighting, then clicking the “Add” button to add it to your query. By using the “Move Up” or “Move Down” buttons, you can move the fields that are in your query to the left or right.
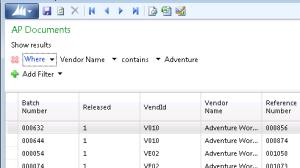
You can also filter your data set. You can do that one of two ways. You can do a quick filter by just clicking on the upper right field, which by default always displays the leftmost column in your query, but can be changed to filter on any field in the query, then entering in the value that you want to find just to the left of that field. It would look like the picture below. See how the results now only show documents where the vendor name contains the word “Adventure”.
The second method of filtering gives you full Boolean capabilities to filter. If you click on the carrot just to the right of the filter field that we used in the above example (See below for illustration), you will see that you now have the ability to filter on more items.
You will now see “Add Filter” on the left side of the Quick Query screen. You will have the ability to choose “And”, “And Not”, “Or”, “Or Not”, or “And Neither”. Normally you will choose “And” for the first line. You will then be able to pick any field that is in your query, then choose the operator. Your choices will be “contains”, “begins with”, “is”, “is not”, “does not contain”, “is between and includes”, “is greater than and includes”, “is less than and includes”, “is empty”. Then you will enter a value. For example, if I want to look for AP documents where the Vendor Name contains “Adventure”, I would create the first line of the Filter as displayed below:
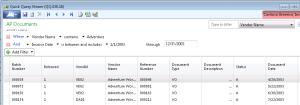
You now have the ability to add more filters if you would like. In my case, I would like to see all AP Documents where the vendor name contains “Adventure”, and where the Invoice Date is between January 1, 2003 and December 31, 2003. See below how I am able to do that:
You can continue adding more filters to the query as needed.
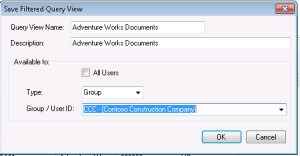
So that is not all you can do with Quick Queries. Once you have created a quick query that you like with the columns that you like and the filters that you need, you can save that query definition so you don’t have to remember all of the columns that you want to add or the fields that you want to filter on. If you click the “Save” icon at the top of the query, it will ask you to give the query a name and whether you want save the query so that all users, a group of users, or an individual user can see your saved query. So if you think that your query is something that everyone could use, you can save it for all. But if your query is probably only something that you or your department might use, you can make it visible to just your department or to just yourself. See below. In this case, I am saving the query as “Adventure Works Documents”, and I am making it available to the permissions group “CCC – Contoso Construction Company”.
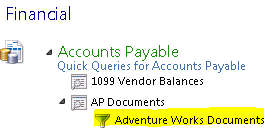
Once saved, the new saved queries will display on the menu as sub queries underneath the base query that you started with. See below:
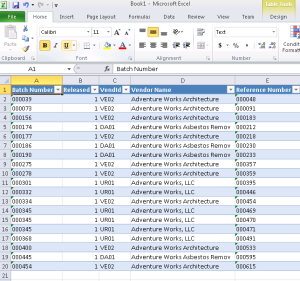
Quick Queries also have the ability to export directly to Excel. To do that, just click on the Excel icon at the top of the screen. This will push the data that you are seeing on the query directly to Excel with column headers. See below example:
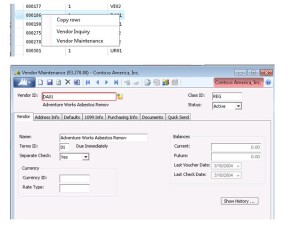
Some Quick Queries also come with “Go To” functionality. “Go To” allows you to “Go To” somewhere else in Dynamics or possibly even outside of Dynamics to drill down or drill around the data. In the case of the AP Documents query, the “Go To” will go to vendor maintenance or to the vendor inquiry for the vendor that you have in context. To use “Go To”, just right click on any row in your query, and see the options that are available. I have right clicked on the document 000186 in the query above, and you will see that my options are “Vendor Inquiry” or “Vendor Maintenance”. If I click on “Vendor Maintenance”, I will be presented with the Vendor Maintenance screen, and Vendor DA01 – Adventure Works Asbestos Removal will be displayed. See below:
We hope this helps you better utilize the Quick Query functionality to retrieve data more easily and effectively in Dynamic SL. For additional questions, contact the Dynamics ERP experts at Boyer & Associates here.


