Hello and welcome back to our blog series on how to use RapidStart Services in Microsoft Dynamics NAV. In this post we are going to work on importing the Excel file into NAV (step 6 of the 10-step process).
At this point, please make sure the file you were working on in step 5 is saved. Our work in Excel is complete and we will be working in NAV from this point forward, unless there are data errors to fix in the Excel file.
Step 6
Before we go further, I’d like to explain one concept in a little more detail. When we import the Excel file into NAV, at the time of import we are copying the data from Excel into NAV’s configuration package. We are not moving the data directly into the tables yet. When we get to the step to apply the data, that’s when the data moves from the configuration package into the table. Does that make sense?
An imperfect analogy is that importing the Excel file is similar to loading the dishwasher with dishes. You haven’t added the detergent yet (validation step) or started the cleaning cycle (applying the import). At the end of the process, you will have clean dishes or in NAV’s case, updated data.
The first thing we need to do is import the data into Excel. Let’s go back to our configuration package that we created previously:

Next, go to the Actions ribbon and select “Import from Excel.”

Alternatively, you can also go to Excel under Tables and select “Import from Excel” there.

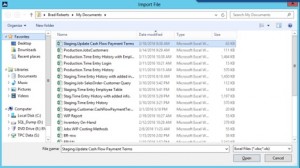
Find and select the file you want to import and click on “Open.”

You will then get a message box like this:

Please wait for the importing process to finish.
When it’s finished, click on Refresh. You will notice that the No. of Package Records field no longer shows a zero value. This shows that you have successfully loaded this configuration package with data.

Since we are only doing updates to existing records, notice that the No. of Package Records equals the No. of Database Records. If No. of Package Records is greater than No. of Database Records, then applying this package will create new records, which might not be your intention. If the number of records is not the same in the two columns, review your work to evaluate which records in Excel should be removed/changed/added and re-import the updated Excel file.
Now we have imported the Excel file data into NAV. In our next blog we will cover how to validate and apply that data into NAV (steps 7 and 8).


