This is part three of a three-part blog.

Overview of steps
In this series of blogs we are walking through how to back up Management Reporter databases, how to find your Management Reporter Administrator account and how to reset or rebuild the data mart. Here are links to the various steps:
- Back up Management Reporter databases (part 1)
- Find your Management Reporter Administrator account (part 1)
- Reset the data mart (part 2)
- Rebuild the data mart (below)
Rebuild Management Reporter data mart
- Log on to the server running the Management Reporter services with an Administrative account found in the “Finding an Administrator account in Management Reporter” step.
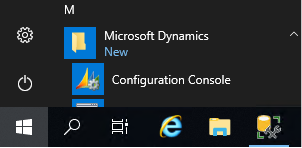
- Open the Configuration Console (Start | Microsoft Dynamics | Configuration Console).
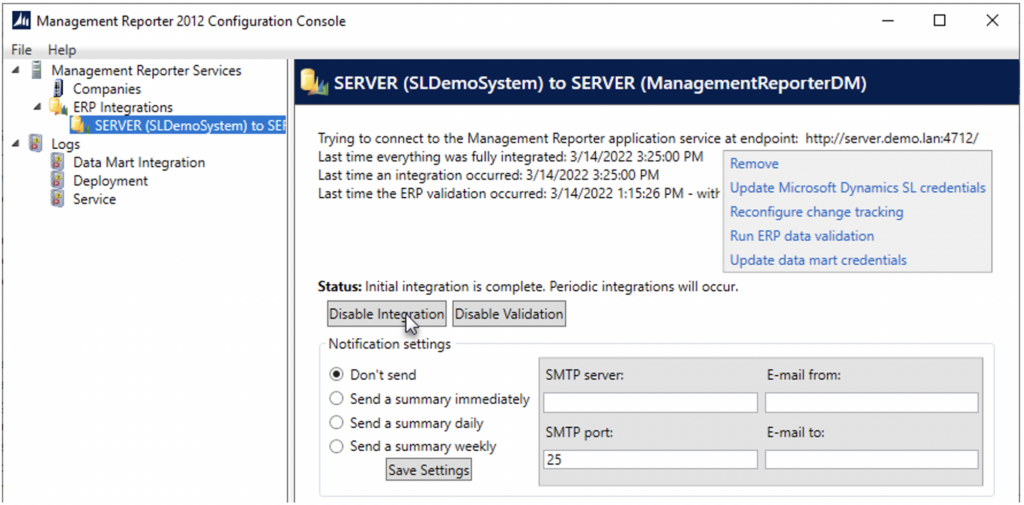
- Select the Integration and then click the Disable Integration button.
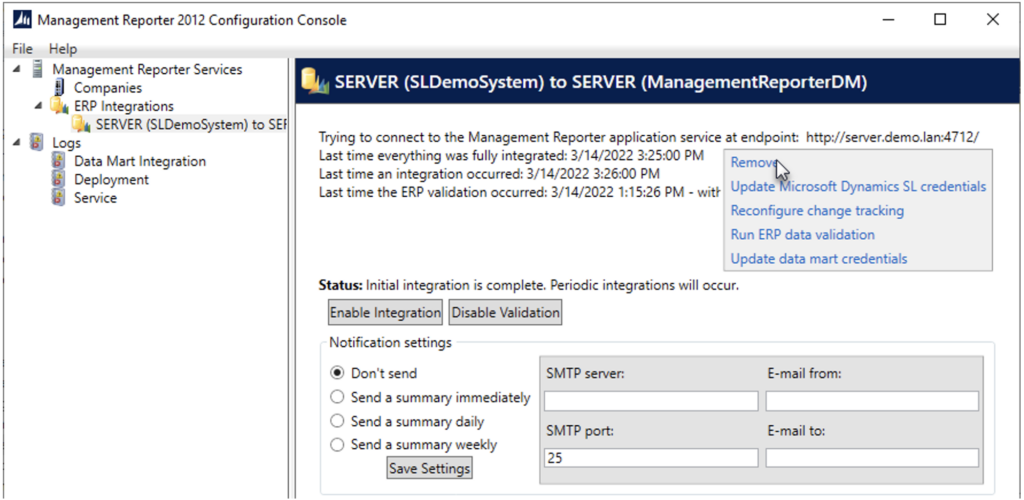
- Once the integration is disabled the button will change to Enable Integration. Then click on the Remove link.
- When prompted by the “Are you sure…” message, click the Yes button.
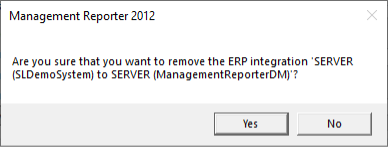
- The integration will now be removed.
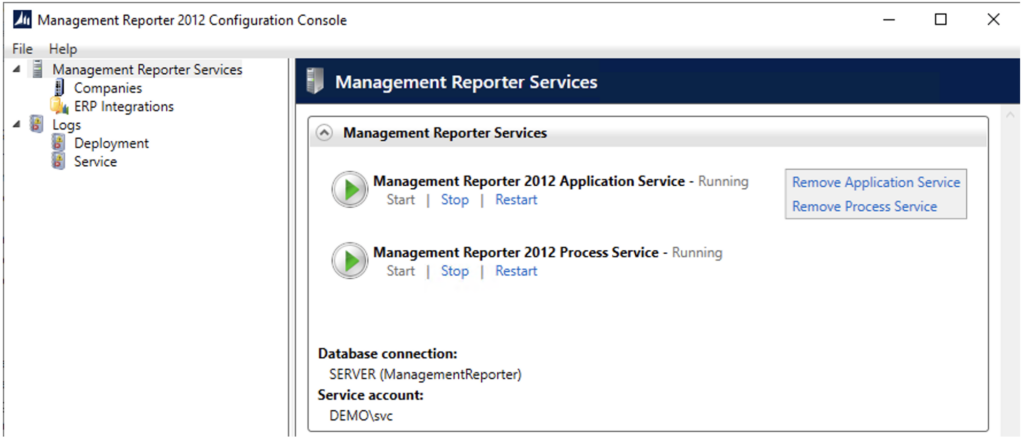
- Delete the ManagementReporterDM database.
- Open SQL Server Management Studio (SSMS) and login with either a SQL account or Windows account that has membership in the sysadmin role on the SQL server.
- In the Object Explorer pane, expand the Databases node.
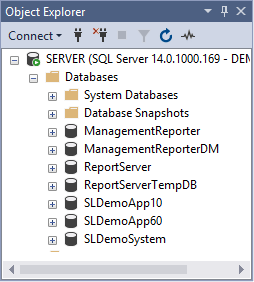
- Right-click on the ManagementReporterDM database and then select Delete.
- On the Delete Object screen, check the box to Close existing connections at the bottom and then click the OK button.
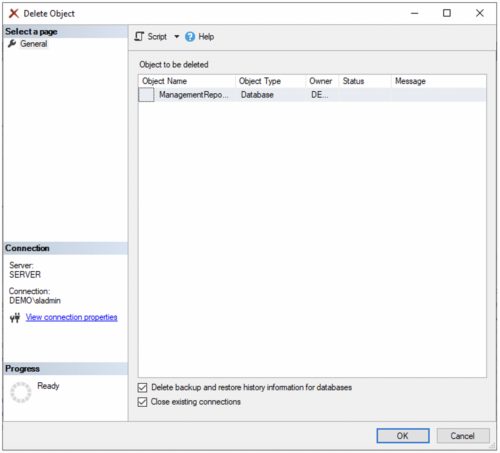
- Create a new data mart Integration. The steps for Dynamics SL and Dynamics GP are similar, but below will detail the differences.
Create a new data mart Integration in Dynamics SL
- From the menu in the Configuration Console select File and then Configure.

- On the Custom Configuration screen check the box for Add Microsoft Dynamics SL Data Mart.
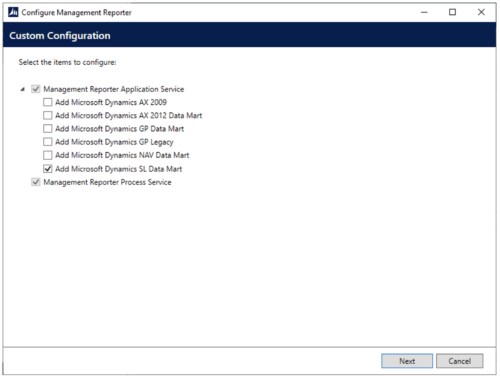
- Click the Next button.
- On the Settings screen enter the following information:
Microsoft Dynamics SL System Database connection information:
Database server: This will default to the server you are logged into. If the SQL server is on a different server enter that name (and instance if applicable) here.
If Dynamics SL uses Windows Authentication, check the box Use Windows Authentication.
User name: Enter the username if using SQL Authentication (This will need to be a user that is a member of the sysadmin role on the SQL server.) If using Windows Authentication this field can be left blank.
Password: Enter the password for the SQL account above. (Leave blank for Windows Authentication.)
Database: Select the Dynamics SL system database.
Data Mart connection information:
If Dynamics SL uses Windows Authentication. Check the box Use Windows Authentication.
User name: Enter the same as above. (Leave blank if using Windows Authentication.)
Password: Enter the same as above. (Leave blank if using Windows Authentication.)
Database: Accept the default ManagementReporterDM
- Click the Next button.
- When prompted for the Change Tracking credentials:
- if Windows Authentication is used, check the Use Windows Authentication box and enter the domain username and password.
- If SQL Authentication is used, enter the same SQL account and password as used configuring the databases.
- When prompted for the Change Tracking credentials:
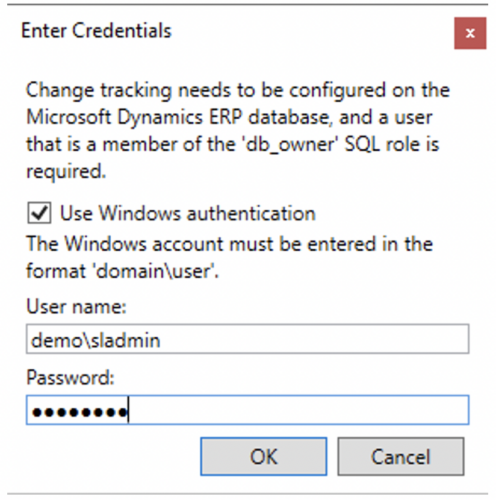
- Click the OK button.
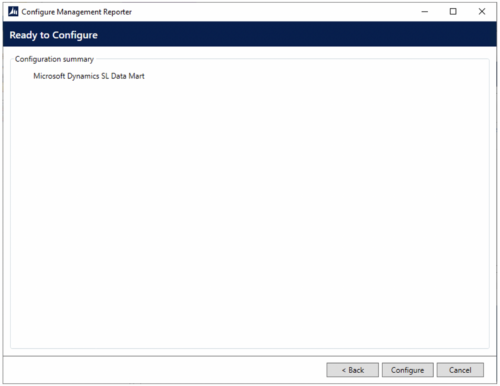
- The configuration will be validated. Then, on the Ready to configure screen, click the Configure button.
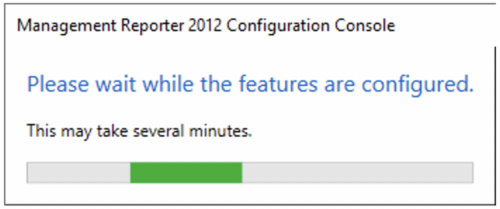
- The ManagementReporterDM database is now being created, and the Please wait message will appear.
- When complete, the new Data Mart integration will show with a check mark.
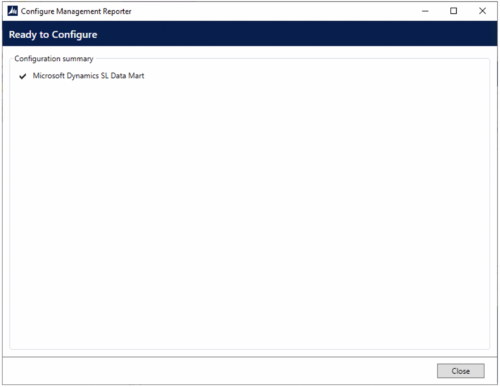
- Click the Close button.
- The Configuration Console screen will now show a new Task in the list. Click the task link.
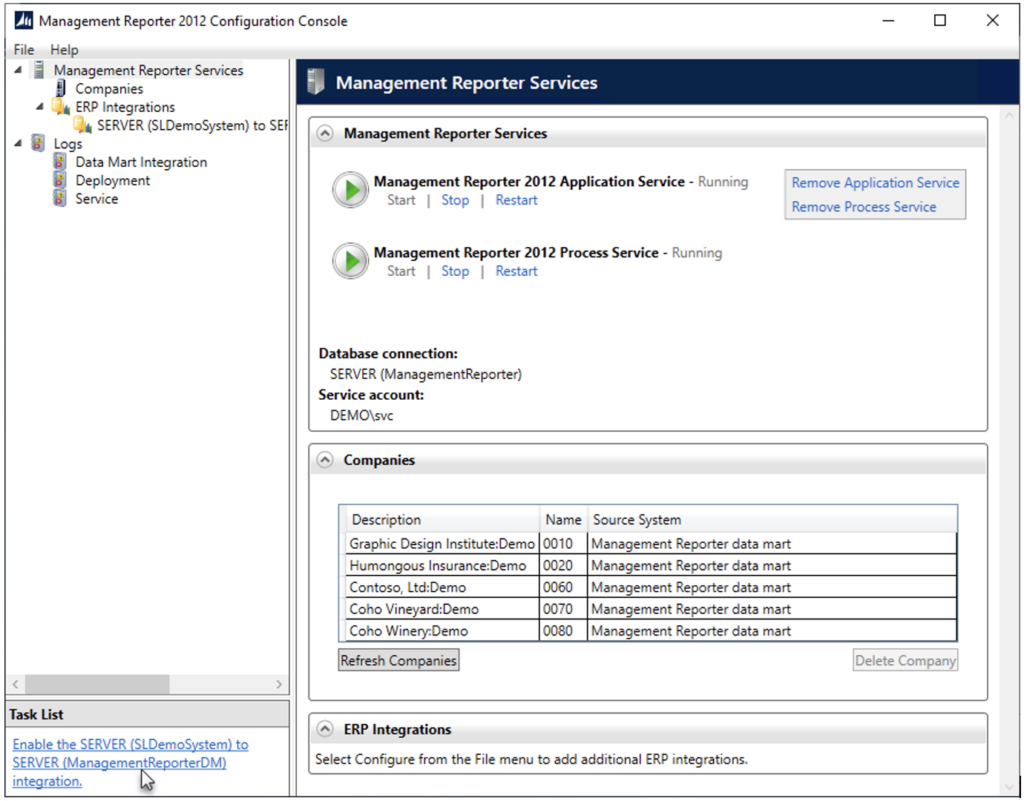
- This will show the integration page.
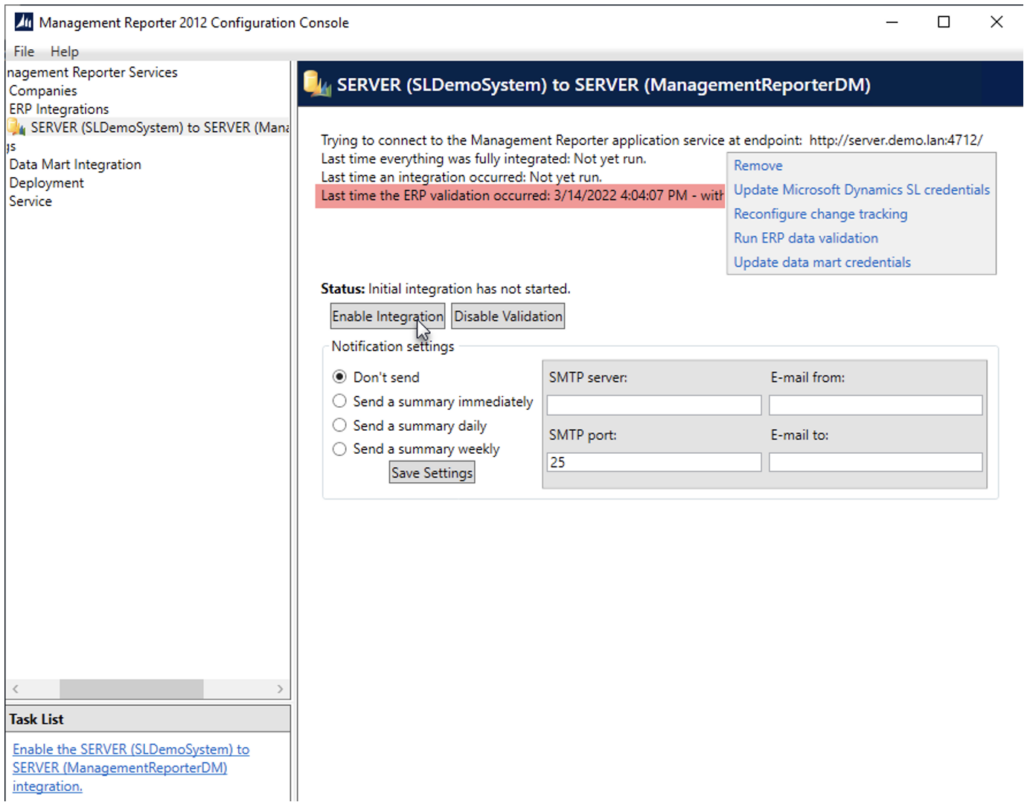
- Make sure the ERP validation completed without errors. If there are errors, the text will be bold. Then click the Enable Integration button.
- The integration will start, and the progress bar will show.
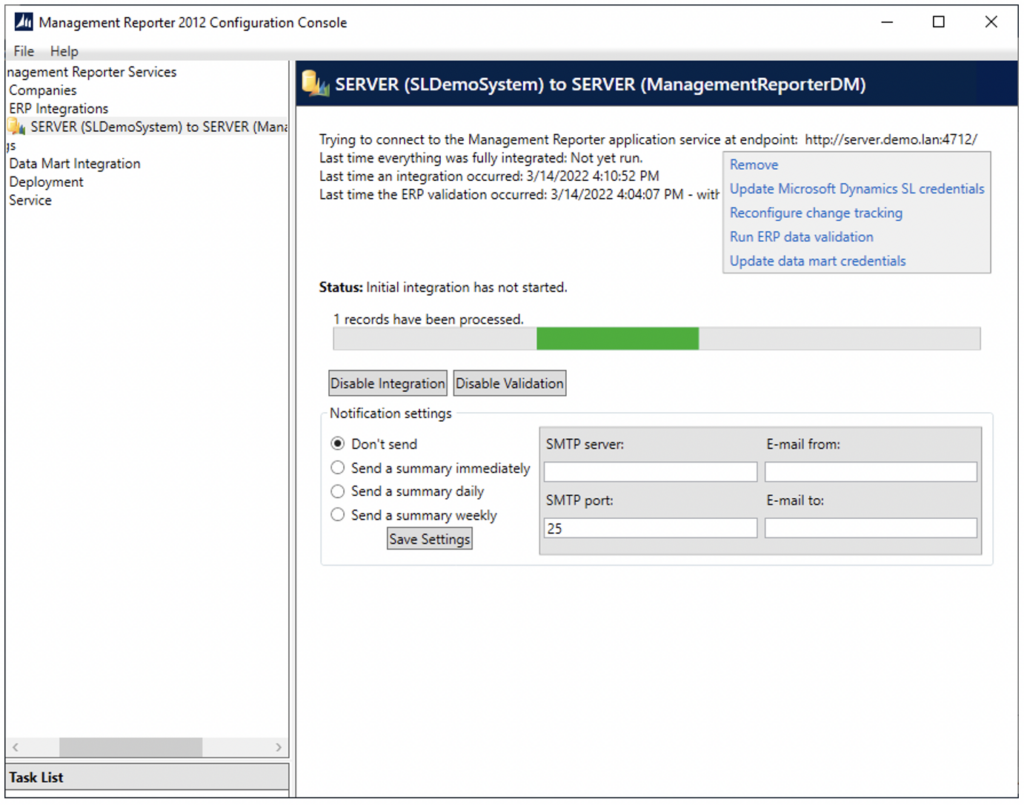
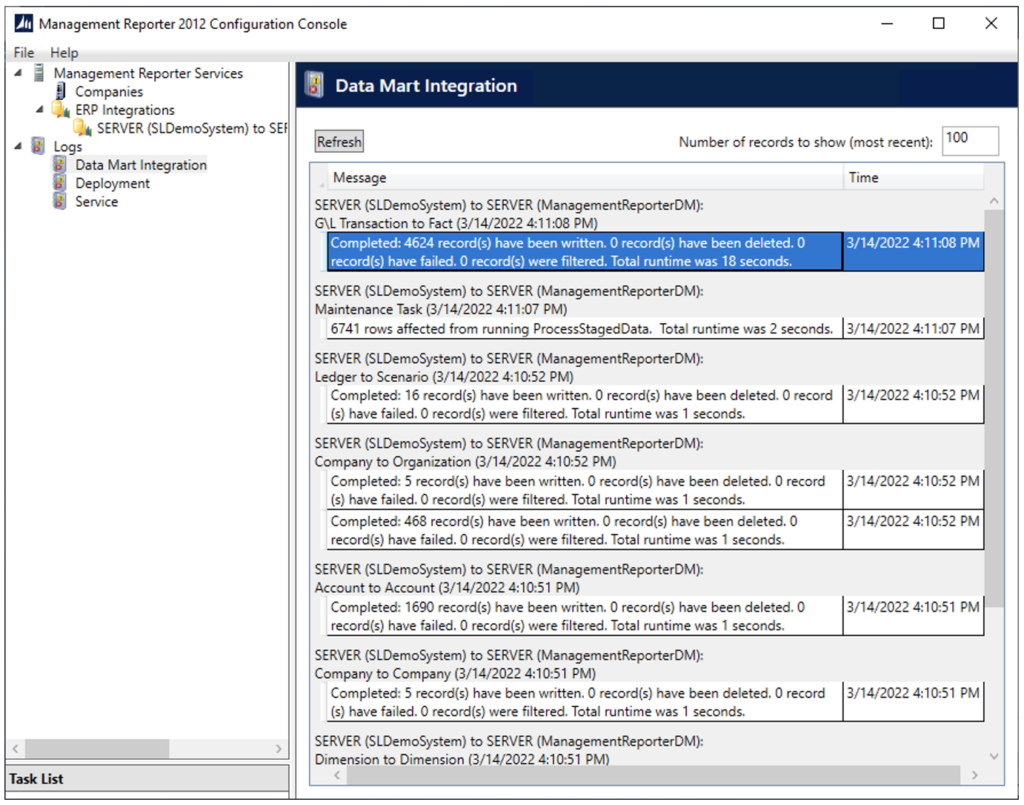
- Check the Data Mart Integration log to see if there are any errors during the integration process. Under logs click on Data Mart Integration. Then click the Refresh button.
- Click on the Integration node in the tree to go back to the integration process.
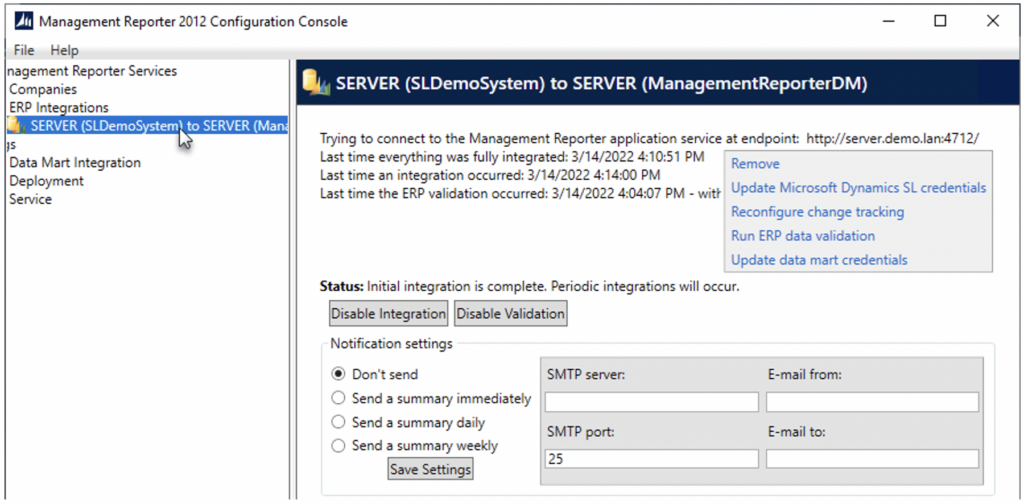
- The status message will show when the integration is complete.
Create a new data mart integration in Dynamics GP
- From the menu in the Configuration Console select File and then Configure.

- On the Custom Configuration screen select Add Microsoft Dynamics GP Data Mart.
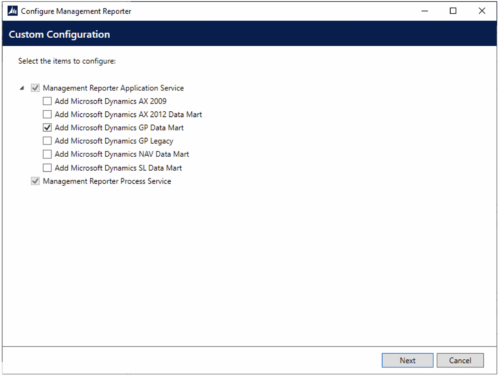
- Click the Next button.
- On the Settings screen enter the following information:
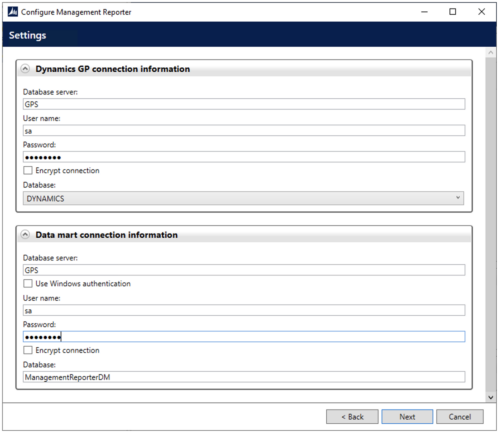
Microsoft Dynamics GP connection information:
Database server: This will default to the server you are logged into. If the SQL server is on a different server enter that name (and instance if applicable) here.
User name: Use “sa” (without the quotes)
Password: Enter the password for the “sa” account.
Database: Select the DYNAMICS database.
Data Mart connection information
User name: Enter the same as above
Password: Enter the same as above.
Database: Accept the default ManagementReporterDM
- Click the Next button.
- The configuration will be validated. Then, on the Ready to configure screen, click the Configure button.
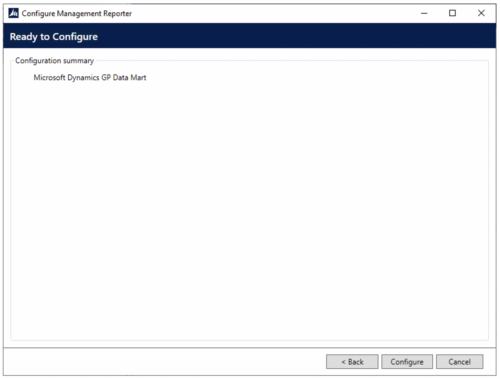
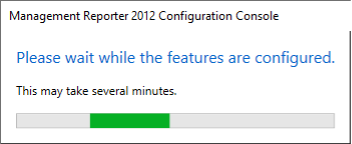
- The ManagementReporterDM database is now being created, and the Please wait message will appear.
- When complete, the new Data Mart integration will show with a check mark.
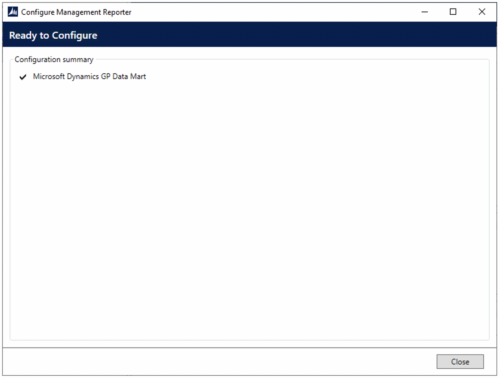
- Click the Close button.
- The Configuration Console screen will now show a new Task in the list. Click the task link.
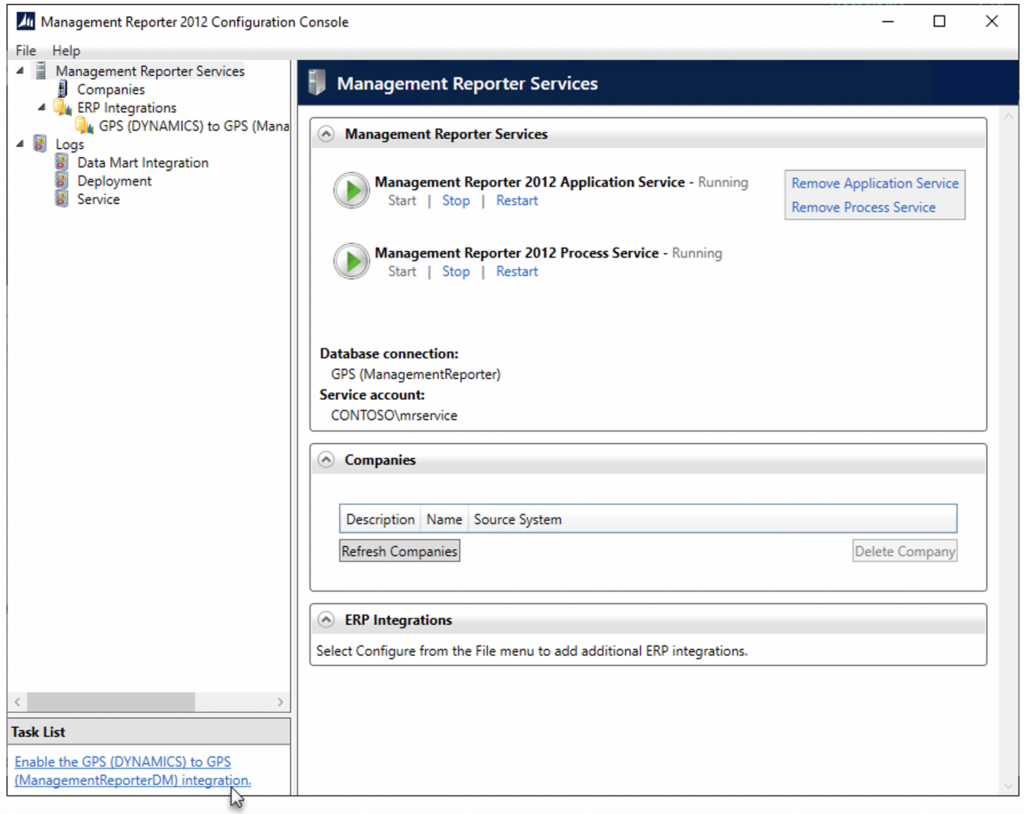
- This will show the integration page.
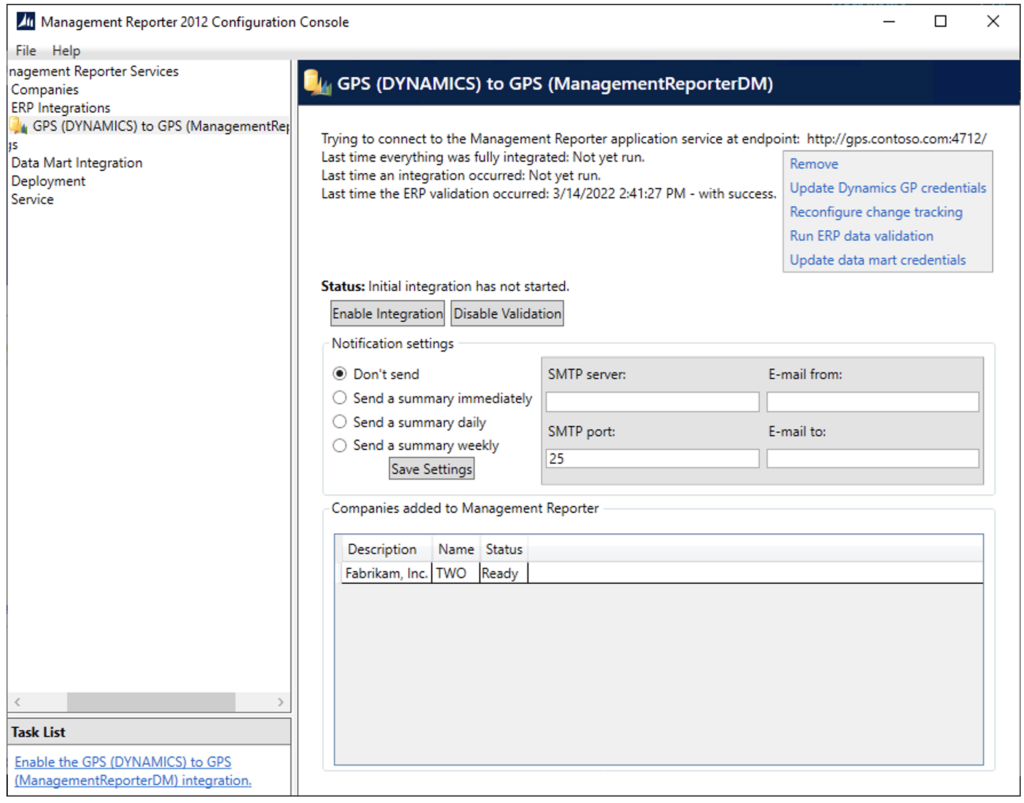
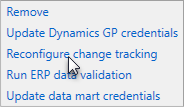
- Click on the Reconfigure change tracking link.
- Enter the change tracking credentials. Use the “sa” account and password.
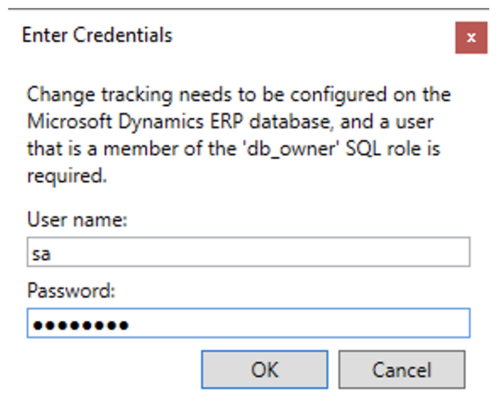
- Click the OK button.
- On the Integration page click on the Enable Integration button.
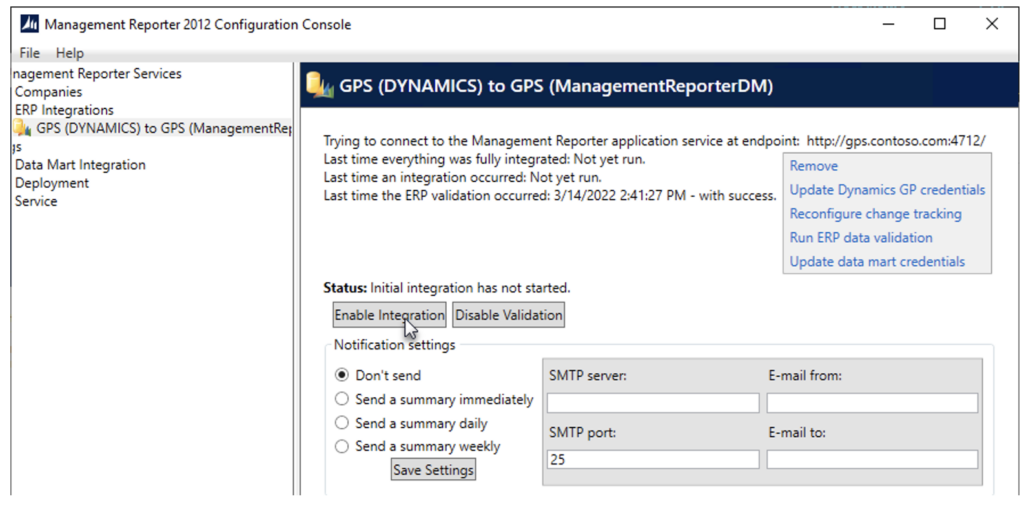
- The integration will start, and the progress bar will show.
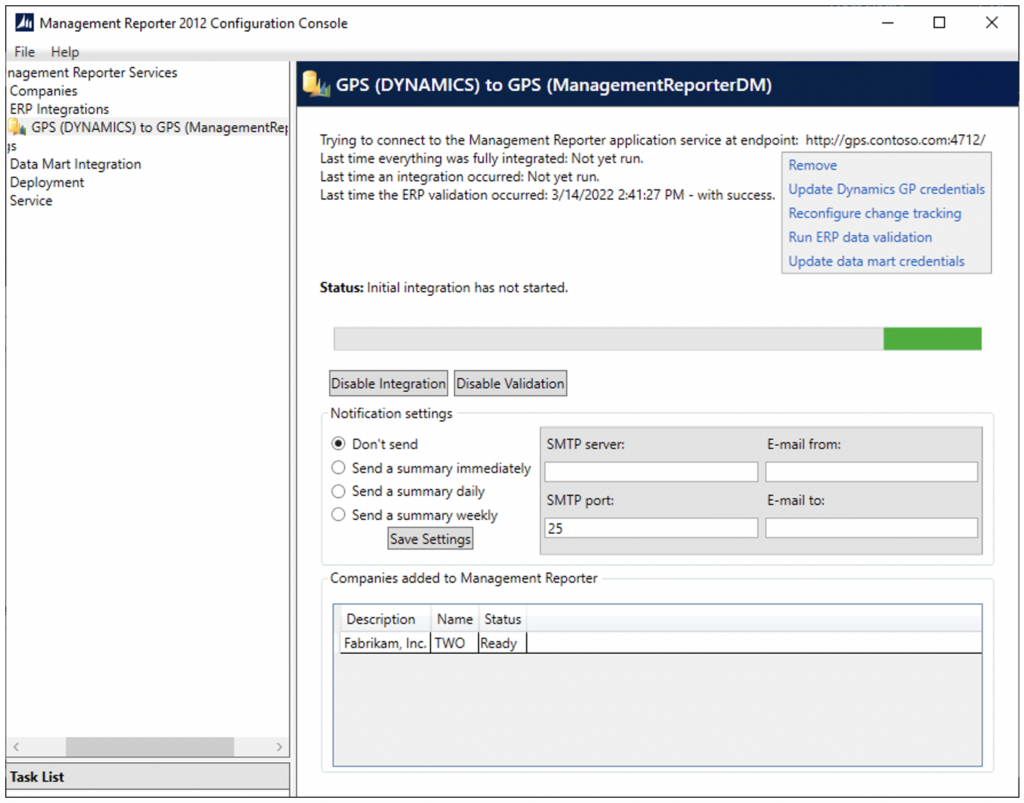
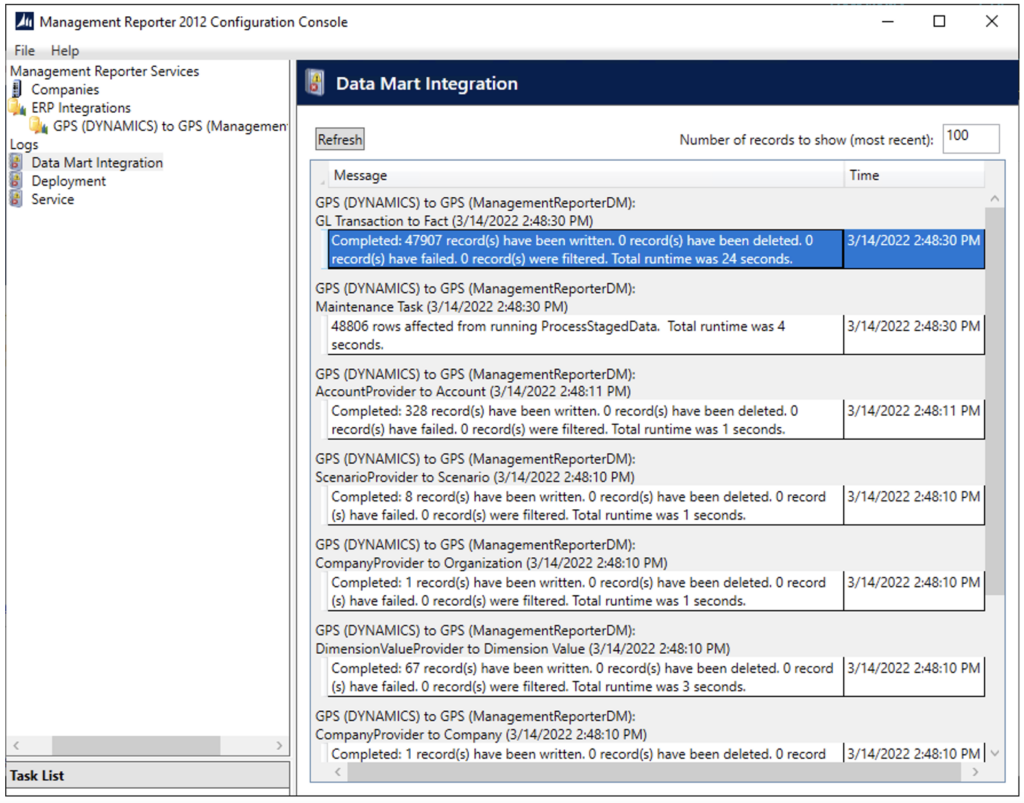
- Check the Data Mart Integration log to see if there are any errors during the integration process. Under logs click on Data Mart Integration. Then click the Refresh button.
- Click on the Integration node in the tree to go back to the integration process.
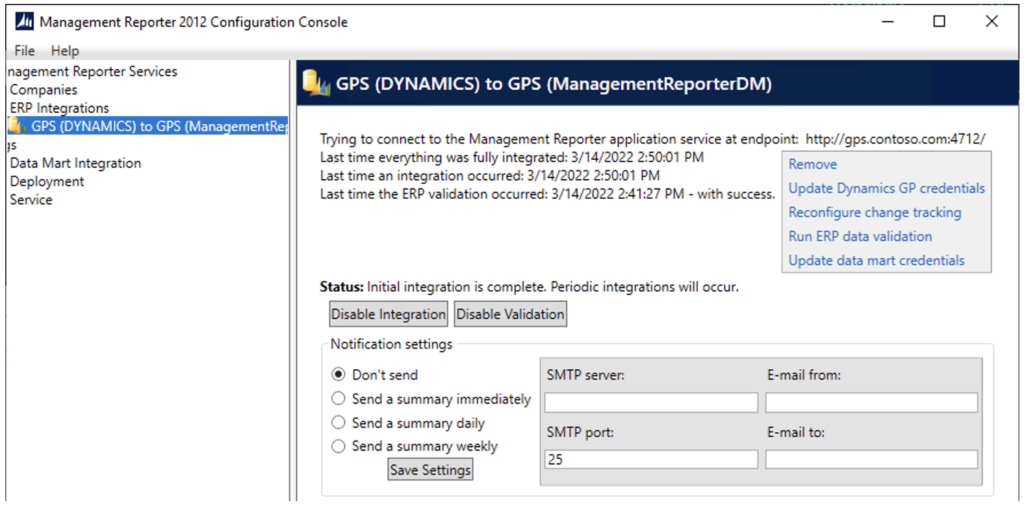
- The status message will show when the integration is complete.
Congratulations! You have successfully rebuilt the Management Reporter data mart! If you need further assistance, please contact us and our Management Reporter experts will be glad to help.


