Are you unsure how to process payments in Business Central? This two-part blog will demystify the different options available within Accounts Receivable.
There has been a lot of confusion around the different methods to enter cash receipt information for Accounts Receivable in Microsoft Dynamics 365 Business Central. The method you choose is your preference, and each has its own advantage and disadvantage.
The intent of this two-part blog is to demystify the different options so you can choose the best one for you. Here’s a summary of what you’ll learn:
- How to register Customer Payments (part 1)
- How to post Cash Receipts (part 1)
- How to enter Deposits (part 2)
- How to process a Refund (part 2)
How to register Customer Payments in Dynamics 365 Business Central
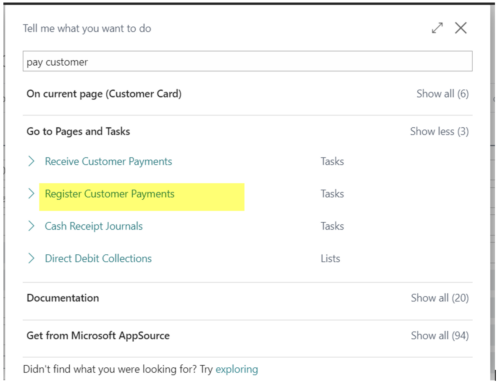
From the Customer List page, choose Process and then click on Register Customer Payments. Or, type “pay customer” in the main search bar and then choose Register Customer Payments from that list. (NOTE: Register Customer Payments can also be accessed from the Customer Card. On the Customer Card, choose Actions and then Register Customer Payments.)
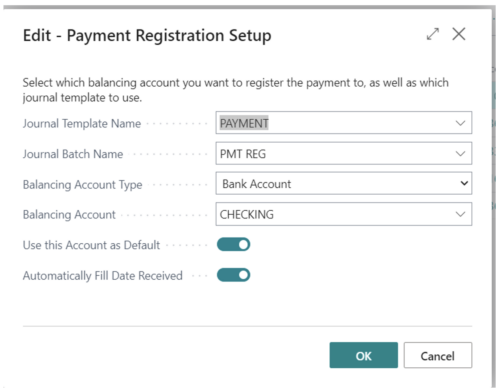
If this is your first time accessing it, you might get the following prompt to set up this page:
If you’re coming from the Customer list page, the following will appear based on the customer you have highlighted on the Customer list page:
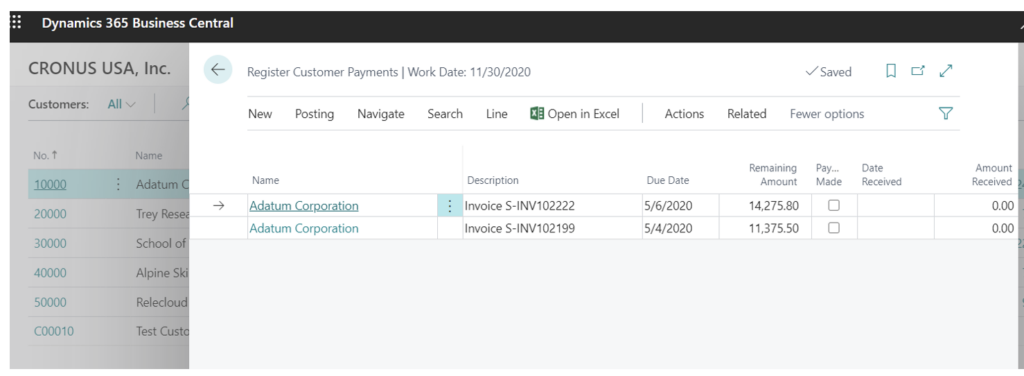
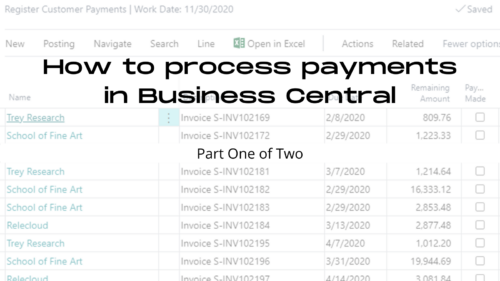
Alternatively, if you’re choosing from the search bar, the system will bring up all customers and all open balances as shown below:
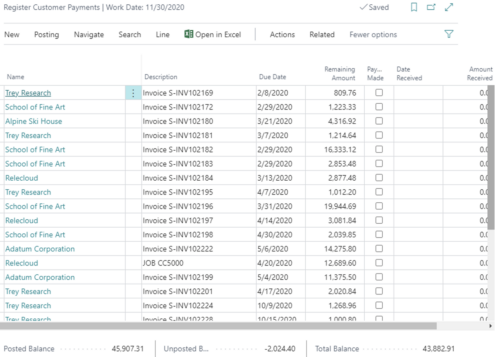
Once on the page, the following options are available: Post Payments, Post as Lump Payment, Preview Posting Payments and Preview Posting Payments as Lump. Let’s take a closer look at each of these …

- Post Payments: This will post a payment for any line that has a checkmark in the Payment Made field. Click on “Payment Made,” and the Date Received and Amount Received will populate. You can enter any identifying information in the External Document Number field. You can modify the date received, amount received and External Document number if needed.

- Post as Lump Payment: This will post a lump payment for all the lines that have a checkmark in the Payment Made field. Be careful to choose only one vendor and check all the lines before posting as a lump payment. After choosing all the lines for a single Vendor, choose Post as Lump Payment. This will post the payment and one lump payment. When you look at the Customer Ledger Entries, you will see one payment.

- From that payment line, choose Entry. Then Applied Entries will show all the entries that payment applied to.

- From the Bank Account Ledger Entries, you can see one lump receipt.

- Preview Posting Payments: This is a preview of what Post Payments will do based on your checkmarks.
- Preview Posting Payments as Lump: This is a preview of what Post as Lump Payment will do based on what you chose in Post as Lump Payment.
Once you have chosen all the payments to make, click on “Posting” and then either “Post Payment” or “Post as Lump Payment” to create and post the entry.
How to post Cash Receipts in Dynamics 365 Business Central
Open the Customer Card and choose Actions, then Post Cash Receipts. This process will simply open the Cash Receipt Journal.

You can also get to the Cash Receipt Journal by typing “pay Customer” or “cash receipt journal” in the main search bar or by navigating to Cash Management and then Cash Receipt Journal from the Home page.
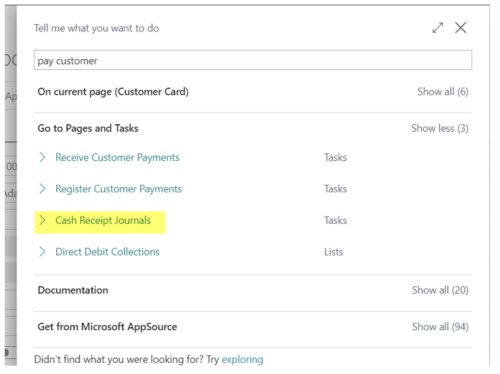
On the Cash Receipt journal page, fill in the following fields:
- Batch Name: Choose a Batch Name
- Posting Date: Enter the Posting Date
- Document Type Enter the Document Type = Payment
- Document No: Enter a Document No if permitted. This is usually the check number.
- External Document Number: If used, this can be any additional reference
- Account Type: Choose Bank Account
- Account No: Choose a Bank Account Number
- Description: Will default
- Amount: I usually leave this blank
- Bal Account Type: Customer
- Bal Account No: Customer Account number
TIP: If you want, you can set up a Cash Receipt Batch with a Balancing Account Number. That will default into the batch when you choose it. If you do that, then you must switch what you see above. The Account Type should equal Customer and the Account No will be the Customer Number. The bank information will auto fill into the Balancing Account Type and Balancing Account Number automatically. The key to remember in this setting is that the Amount needs to be a credit so that you credit AR and debit bank.

Now click Process and then Apply Entries.

The following list will appear of all the open entries that can be paid:

For each invoice you want to pay, highlight the line and click “Process.” Then click “Set Applies to ID.”
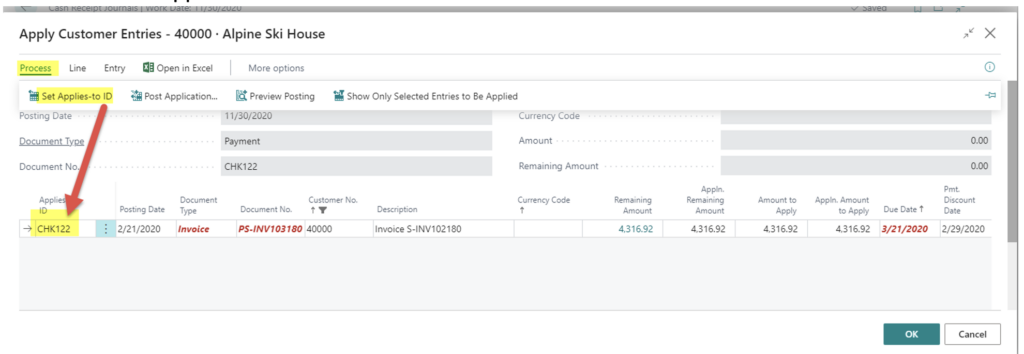
Once back on the Cash Receipt Journal, you will see the amount populate automatically based upon the invoices you chose.

You can now enter another line for another Customer and repeat the process or just post.
Now you know how to register Customer Payments and post Cash Receipts in Business Central. Part 2 of this blog dives into receiving Deposits and issuing Refunds. If you want additional assistance, check out our Business Central Support Plans.


