If you’re using the Intercompany feature within Dynamics 365 Business Central, you might be unsure of what to do when a new company is added to your environment. This is especially true if your Microsoft Partner set up the system for you. Below, we’ll walk you through linking a new company to your other Intercompany Partners. This way you can start executing Intercompany Transactions in Dynamics 365 Business Central as quickly as possible.
These steps will take place in the new company:
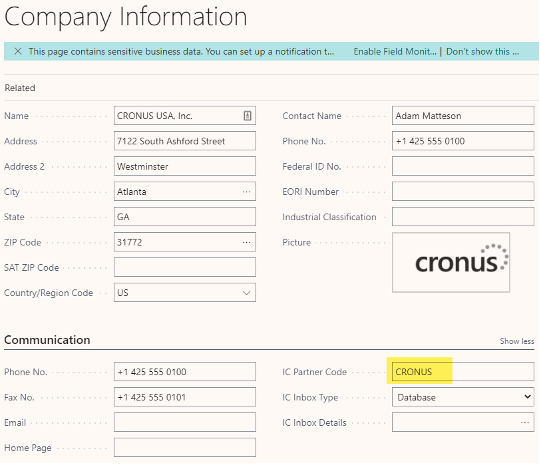
- Go into Company Information and assign the Company an IC Partner Code. IC Inbox Type should already say Database. You can keep this setting.

- It’s now time to create an Intercompany Partner for the Company with which you wish to transact.
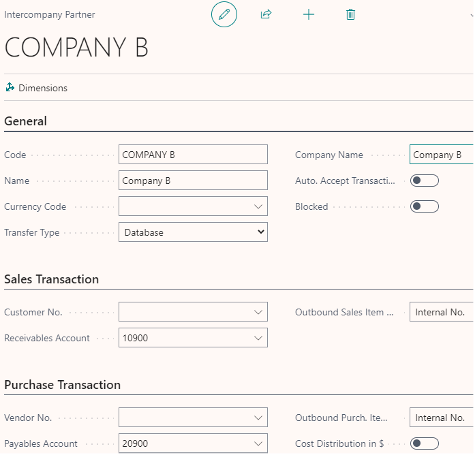
- Search for Intercompany Partners and then click on “+New.”
- Make sure that the Code matches the other company’s IC Partner Code (which you now know is stored in that company’s Company Information).
- Check that the Inbox Type is Database.
- Link the Intercompany Partner record to the newly created company by drilling into the Company Name field (using the ellipsis in that field).
- Assign the Receivables and Payables GL Accounts (Customer No. and Vendor No. are optional).

You now need to switch over to each Company that you linked the new Company to and follow the same steps.


