If you want to learn how to create a new quick query in Microsoft Dynamics SL, you should know that the actual starting point for this process is the view. You will need to create a new view if there is no existing view that contains the data you want for your new quick query. Creating this view is the heavy lifting for this process and requires that you know and have access to SQL Server. This blog explains the process after the view is created. (Learning SQL is asking a bit much from a short document — For that, read one of the many books on the topic).
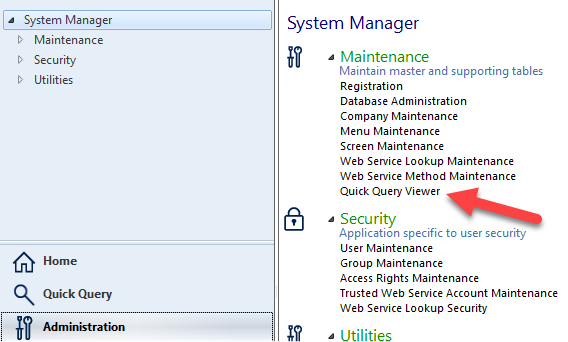
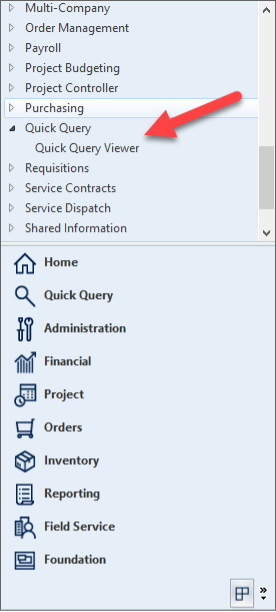
Let’s start the process of creating a quick query in Dynamics SL from an existing view. First, run Quick Query View in the System Manager module under Administration. If you need to use All Modules to access the program, that is found in the Quick Query module (because consistency becomes boring, no doubt).
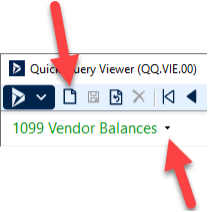
To start a new quick query in Dynamics SL, press the New button. To edit an existing view (which will only work for custom views), drop down the list at the name of the active view.
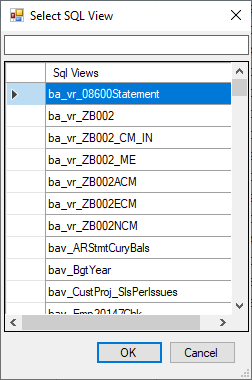
The New button brings up a list of all views. Select the one that you want to use.
This will add all fields in the view to the grid in the order that they appear in the view. Make any changes that you want to the appearance of the query – move fields, remove fields, rename the columns, etc. Also add any filters that should always be used for this quick query. (Please note the word “always.” If the filter is only sometimes needed, don’t add it here – That will be done when using the quick query.) Basically, make the screen look the way that you want it.
Once the results look the way that you want them, save your changes by pressing the Save button.
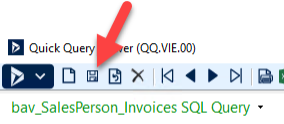
This brings up the Save screen:
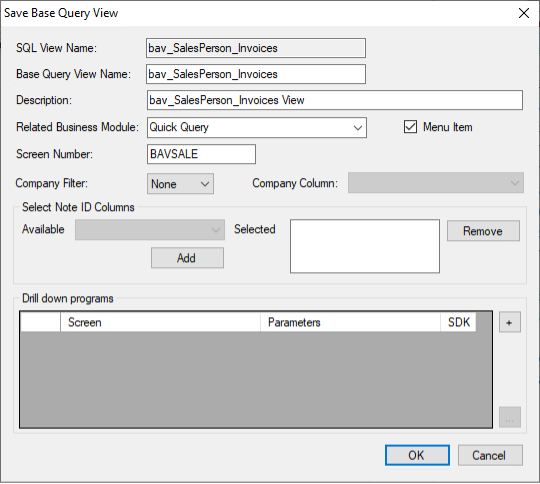
Here’s a breakdown of the information needed on each of the fields:
- Normally, you will want to leave the Base Query View Name alone. Only change it if necessary (Changing it can make things more difficult). You will need this name when you add the new query to the menu.
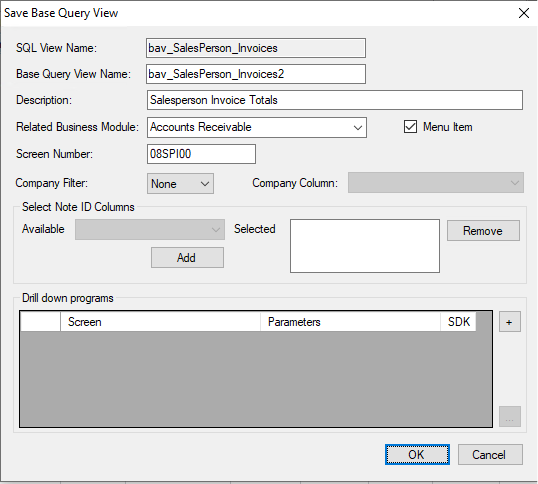
- The Description should be changed to the name that you want to see for the query both on lists and as its title. (Note the screenshot earlier showing “1099 Vendor Balances” in contrast to the screenshot showing “bav_SalesPerson_Invoices SQL Query.”)
- The Related Business Model should be changed to the module related to this quick query.
- The Screen Number should be changed to a valid screen number – Any number already used will not be allowed and, in some cases, values for the first two digits are restricted.
As a rule, no other fields should need to be modified on this screen. If desired, other fields may be modified for the following reasons:
- Company Filter and Company Column allow you to add an automatic company filter (Company Filter option All filters the result set to all companies to which the user has access rights).
- Select Note ID Columns allow you to identify the field that controls access to the note (if you want to be able to look up the note).
- Drill down programs allows the user to indicate a program and the parameters that it should be passed (up to 3). Here are a couple of side notes about the drilldown feature: First, the program called must accept parameters and you must pass the parameters needed in the correct order (which can be a problem). Second, to open the linked screen, right click on the line in the quick query grid and select the desired linked program from the menu that comes up. (It is possible to have more than one program linked to the query).
Press “OK” to save this quick query to the QVCatalog table and the Screens table. You will also see the change of the name in the dropdown list for the queries.
Below is an example of a modified save screen that will provide data for the final setup steps.
This new Dynamics SL quick query will need to be added to the menu using the Menu screen. Select the group that contains your custom entries (especially the quick queries). In the quick query module (or wherever you decided this should be added to the list), find the module (or screen group) that this new view should be added to and press the New Link button.
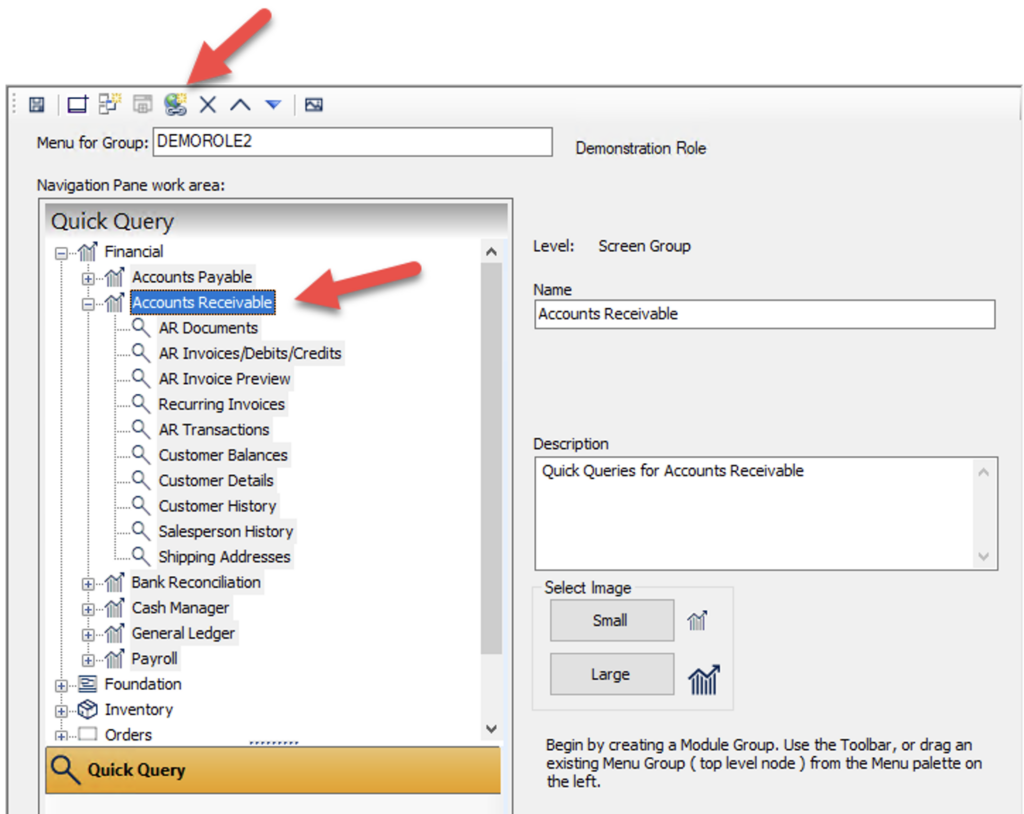
This allows you to enter the name of the view and its screen id. Note: This will default in the wrong command line (it treats this screen as a normal executable).
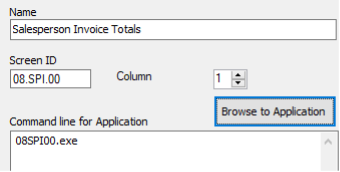
Copy the command line for an existing quick query in Dynamics SL. (This is the easiest way, but you can type the command based on the screen below if you prefer.) Change the name of the view to match the one for your quick query. The parameter in the line is the name of the base query from saving the quick query earlier. (You do remember that name, right?)
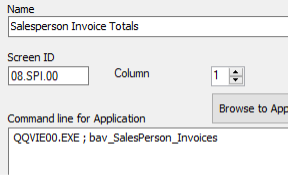
Save your changes. Close Dynamics SL. (Clear the menu cache if necessary to force the menu to rebuild.) Reopen and the new quick query will appear on the menu and should open. You will still need to grant access rights to allow non-administrators to use the query. (You will want to grant yourself access prior to closing SL if you are not an administrator yourself so that you will be able to see it.)
Access rights are needed to use quick queries in Dynamics SL. The user (or a group that the user is in) needs to have rights to both QQVIE00 and the individual quick query (08SPI00 in this example).


