1. How to Customize Columns in Dynamics NAV
Sometimes it can be frustrating to open a list of data in Microsoft Dynamics NAV and see multiple columns of information that you don’t need — or worse, not see the columns you really do need!
Not everyone in your company needs to see all the same details on a given list. Thankfully, Dynamics NAV is super customizable and allows each user to determine how a list appears for them.
In a List view, you can:
- Choose Columns and arrange them in ascending/descending order to best organize the information relevant to you.
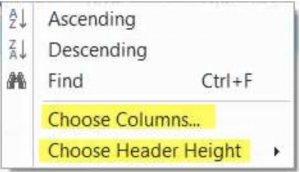
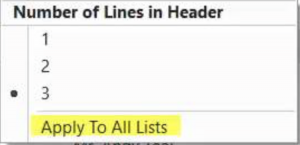
- Choose Header Height
- Apply your customized settings from one list to all Lists. As the below screenshots illustrate, simply click on the arrow next to Choose Header Height and click on “Apply To All Lists.”
You can also add a Freeze Pane, which freezes some columns in place while allowing others to scroll horizontally. This lets you decide which key data stays fixed in the left static column so that it’s always visible (see below).
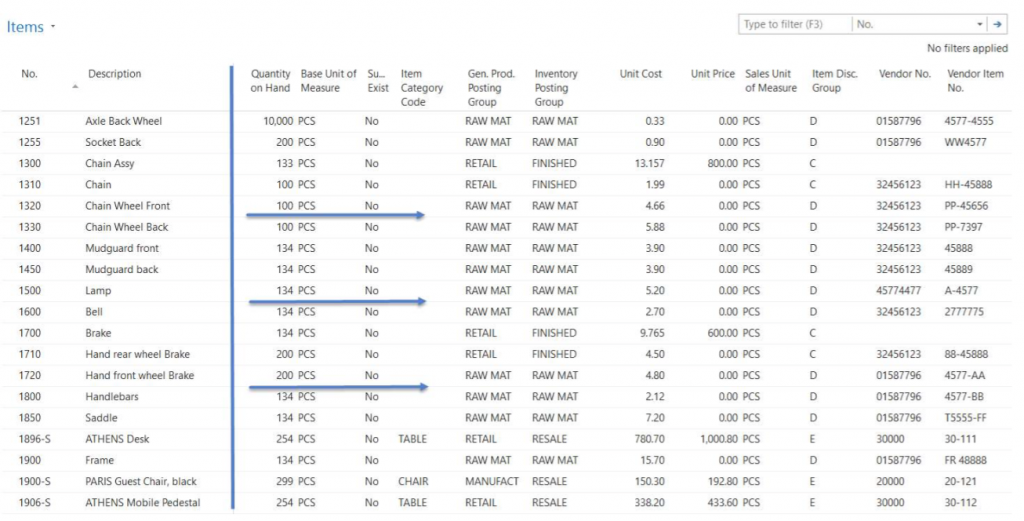
Under Choose Columns, click on the column after which you want to start a freeze pane and select Add Freeze Pane. Any columns above the Freeze Pane line will be fixed while any others below it will scroll. You can readjust the columns by clicking or dragging or Remove Freeze Panes as needed.
2. How to Search NAV by Filtered Values
Often, when looking at a list in Microsoft Dynamics NAV, you want to filter the results based on a specific criteria — or Value as it’s called in NAV. Here’s a step-by-step process on how to create a filtered search:
- Go to the upper left corner of the List and type in the Value you want to pinpoint.
![]()
2. Next, go to the upper right corner of the List and determine where you want the results to show. Note: You can add more than one Filter if needed.

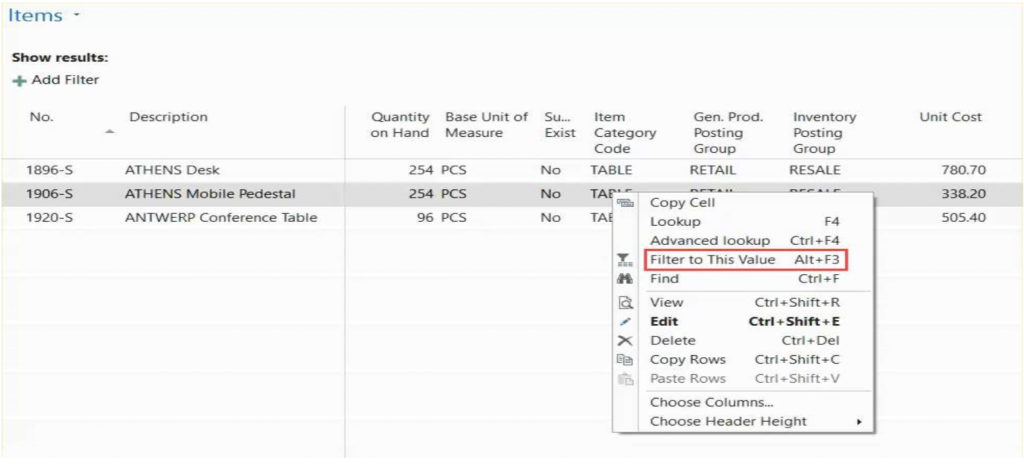
3. Finally, right click on the field within the List and click “Filter to This Value.”
3. How to Save a View in NAV’s Navigation Pane
Do you find yourself spending time setting up the same filters or views every time you enter Microsoft Dynamics NAV? Why not save your work the first time and have it ready to go the next time you log in to the system?
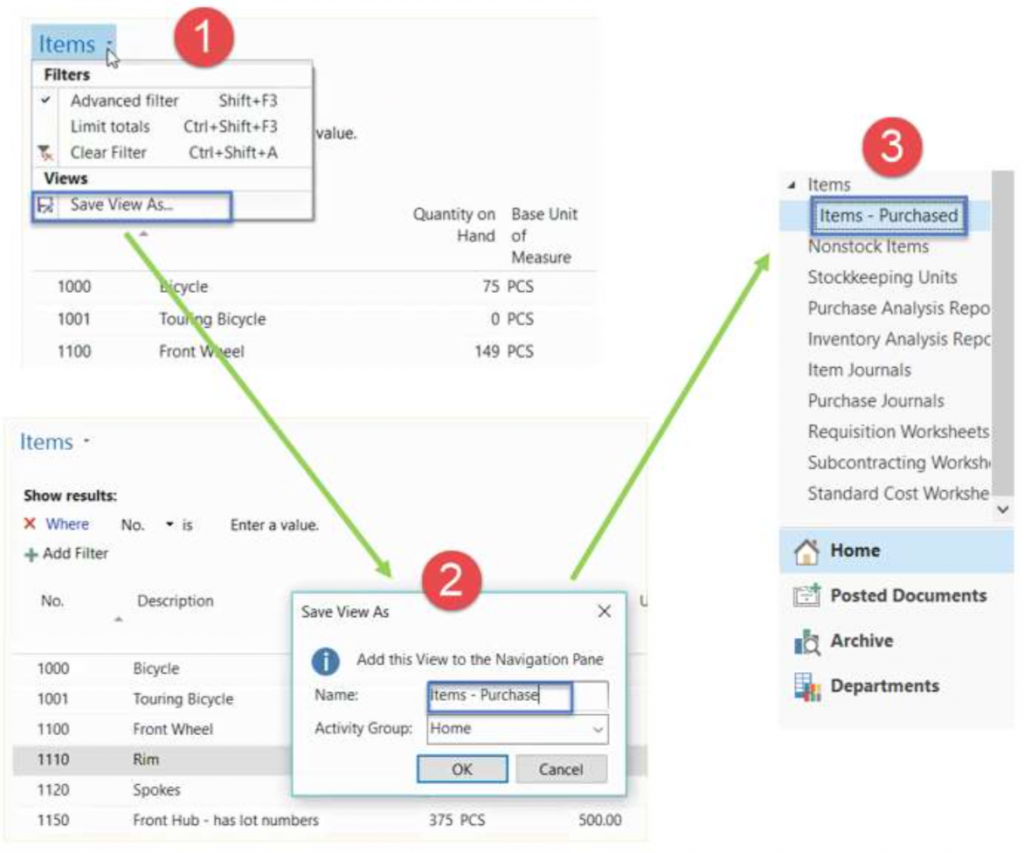
Dynamics NAV allows you to save a specific view to your personal Navigation Pane in three easy steps:
- Under Items, go to Views and click on “Save View As.”
- A pop-up box will appear allowing you to add this preset View to the Navigation Pane. Choose a title for the View and click “OK.”
- Now go back to Items and you will see your newly saved view in the drop-down list of optional views.
4. Customize Fast Tabs and Fact Boxes in Dynamics NAV
You can customize just about any view in Microsoft Dynamics NAV. We’ve already discussed how to customize which columns you see in any given List. At the Page level, you can also customize the following features to hide or show fields as desired:
- Fast Tabs
- Fact Boxes
- Ribbon
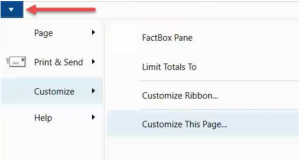
To customize the layout of a page, go to the Application menu, navigate to Customize and click on Customize This Page. Choose one of the features above that you want to customize.
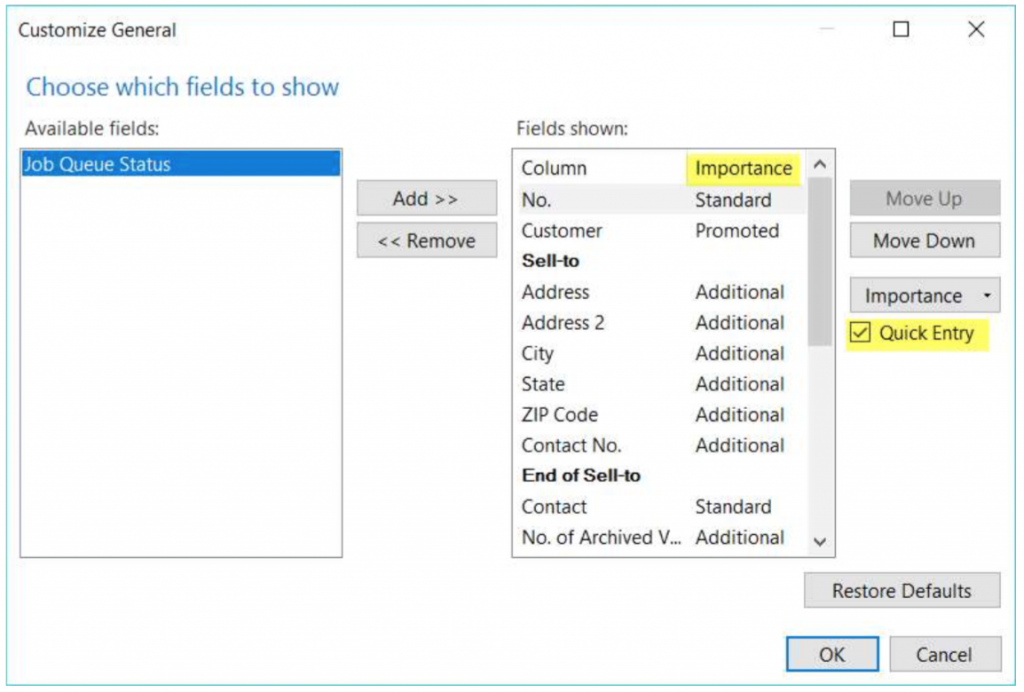
Under Fast Tabs, you can add or remove Fast Tabs on a Page, add or remove fields for each Fast Tab and rearrange the order in which they appear. Let’s break down a couple additional customizations in this section:
- Importance — This determines when the field is visible:
- Standard: The field is visible when the Fast Tab is expanded.
- Promoted: The field is visible when the Fast Tab is expanded. The field value is also visible when the Fast Tab is collapsed.
- Additional: The field is normally hidden. Expand the Fast Tab and click the Show more fields button to make it visible.

- Quick Entry — The Quick Entry feature allows you to quickly jump between essential data entry fields. Check this box for any fields that are typically filled in when entering a record. Press the Enter key to skip between the Quick Entry To access a skipped field, use the Tab or Shift-Tab keystrokes to cycle through every field on the Page.
For Fact Boxes, hover the cursor over the box until you see the Actions gear icon. Choose Actions, Customize and from there you can add or remove fields as desired.
5. How to Add a Button to a Navigation Pane
The Navigation Pane in Microsoft Dynamics NAV organizes Menu Items by functional area. All users have a Home Button with commonly used Menu Items and, optionally, one or more Activity Buttons with additional Menu Items.
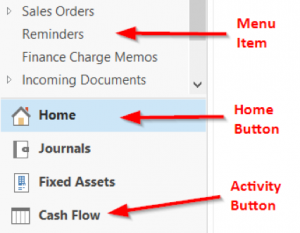
Users can add Activity Buttons to the Navigation Pane to create shortcuts to their most often used actions.
To add an Activity Button, right click on the Navigation Pane and go to Customize Navigation Pane.
Select Create a New Button. In the pop up window, type in a name for your new button. In the example below, we are creating an “Archive” button. You can also choose an icon to represent the new button.
[button link=”https://www.boyerassoc.com/blog/” color=”default” size=”” stretch=”” type=”” shape=”” target=”_self” title=”” gradient_colors=”|” gradient_hover_colors=”|” accent_color=”” accent_hover_color=”” bevel_color=”” border_width=”1px” icon=”” icon_divider=”yes” icon_position=”left” modal=”” animation_type=”0″ animation_direction=”down” animation_speed=”0.1″ animation_offset=”” alignment=”left” class=”” id=””]More Blogs![/button]


